
You’ll turn simple sugar cookies into showstoppers using measured techniques and clean finishes. Think royal-icing filigrees, marbled metallics, embossed medallions, and textured sweater knits—each idea focuses on a specific tool, consistency, or timing to get crisp edges and glossy surfaces. I’ll walk you through setups, tips for chilling and curing, and quick fixes for common mistakes so your platter looks professionally styled—and you’ll want to try the marbled ornaments first.
Classic Royal Icing Snowflakes
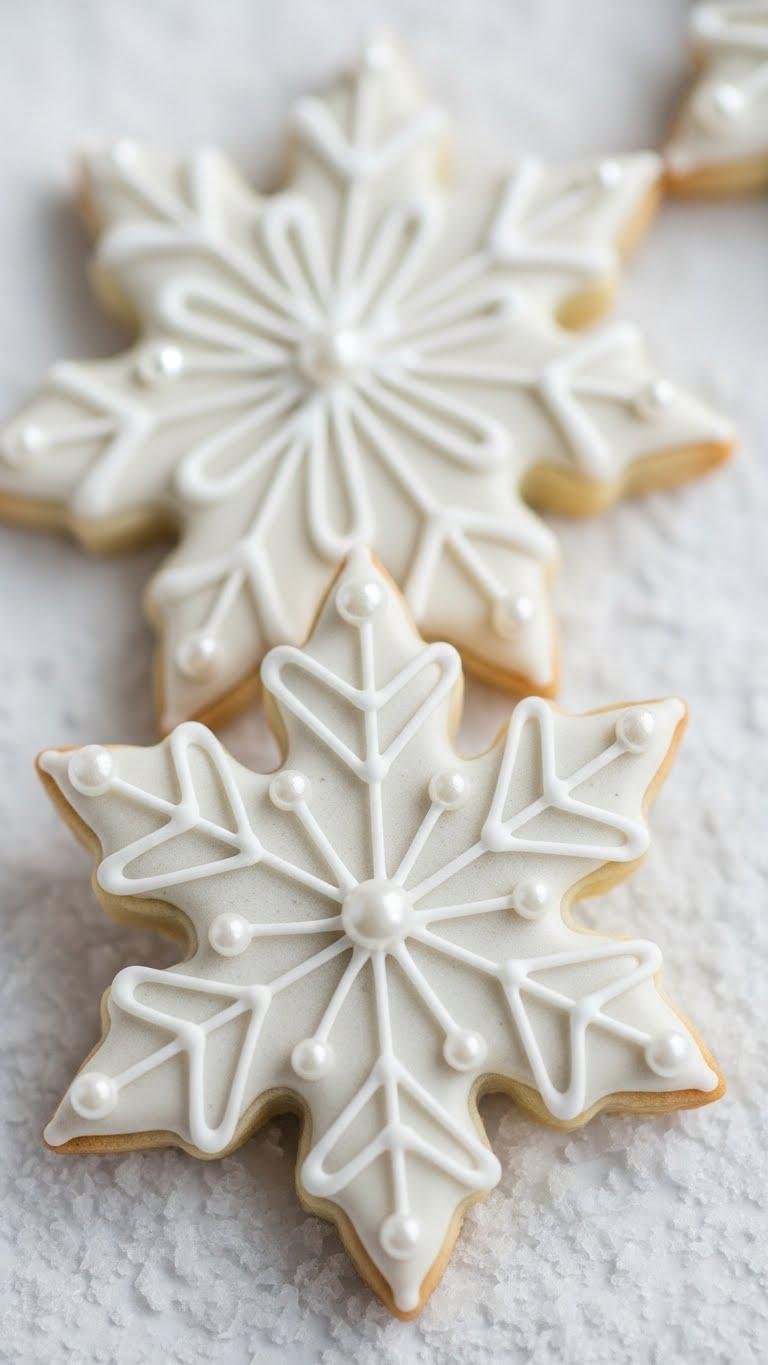
When you want crisp, glassy snowflakes, prepare royal icing to a stiff-piping consistency and transfer it to a fine round tip; this gives you the control needed for delicate arms and sharp points.
You’ll execute filigree piping with steady pressure, layering geometric spokes, then add edible pearlwork at intersections for contrast. Work confidently, pause between layers, and cure fully for clean, airborne silhouettes.
Marbled Ornament Cookies
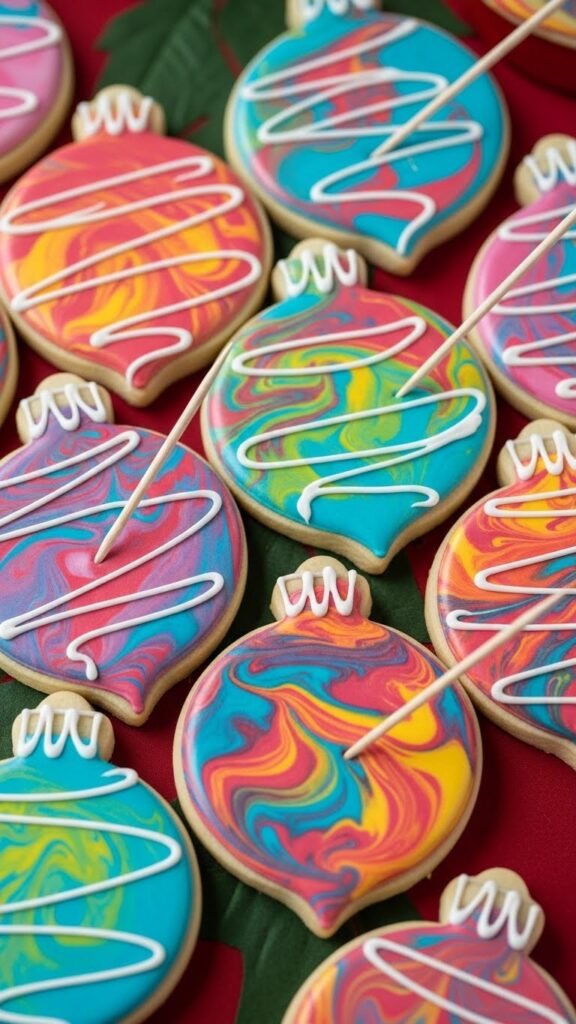
Often you’ll start marbled ornament cookies by flooding a base color, then immediately adding drops of contrasting colors and dragging a toothpick or skewer to create fluid veins.
You’ll control marbled glaze techniques with measured pressure and timing, shaping ornament inspired shapes precisely. Let colors flow without overworking; cure times set the pattern. Trim edges cleanly for a liberated, polished finish.
Embossed Stamp Holiday Medallions

If you enjoyed the soft glazing and feathered edges of vintage shaded stars, you can shift toward a tactile technique that emphasizes imprint and relief: embossed stamp medallions.
You’ll press calibrated stamps into rolled dough, creating crisp rustic imprints and refined floral medallions. Seal edges, chill briefly, then flood lightly to highlight relief. This method frees design choice while ensuring repeatable, museum‑clean results.
Glitter-Dusted Snowballs
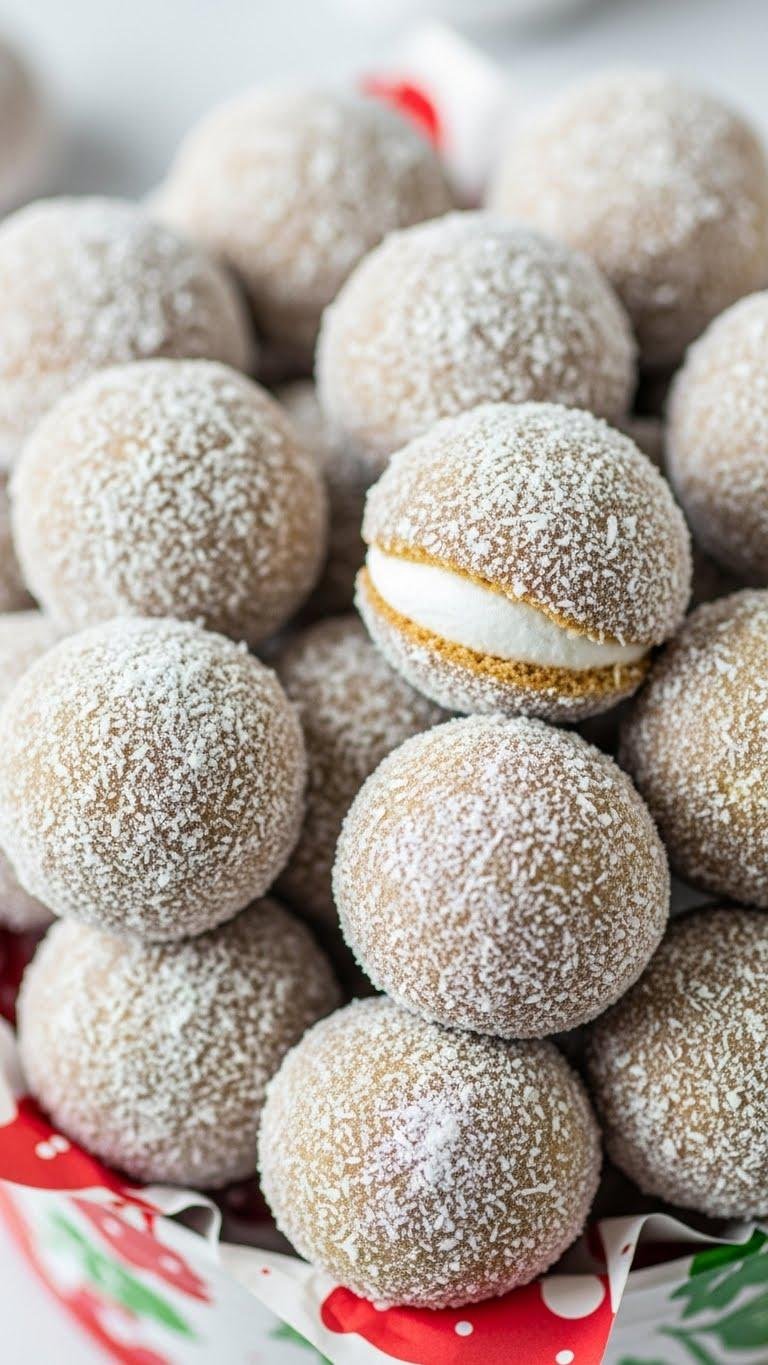
You’ll roll bite-sized dough into uniform spheres, then coat them in a fine sugar-glitter blend that catches light without obscuring texture. You’ll press chilled centers of frosted marshmallow into each, then seal and rebake briefly for structure. Finish with a light vegan coconut dusting for matte contrast. Pack loosely so coatings stay intact and guests can handle them freely without smudging.
Layered Gingerbread Men With Scarf Details
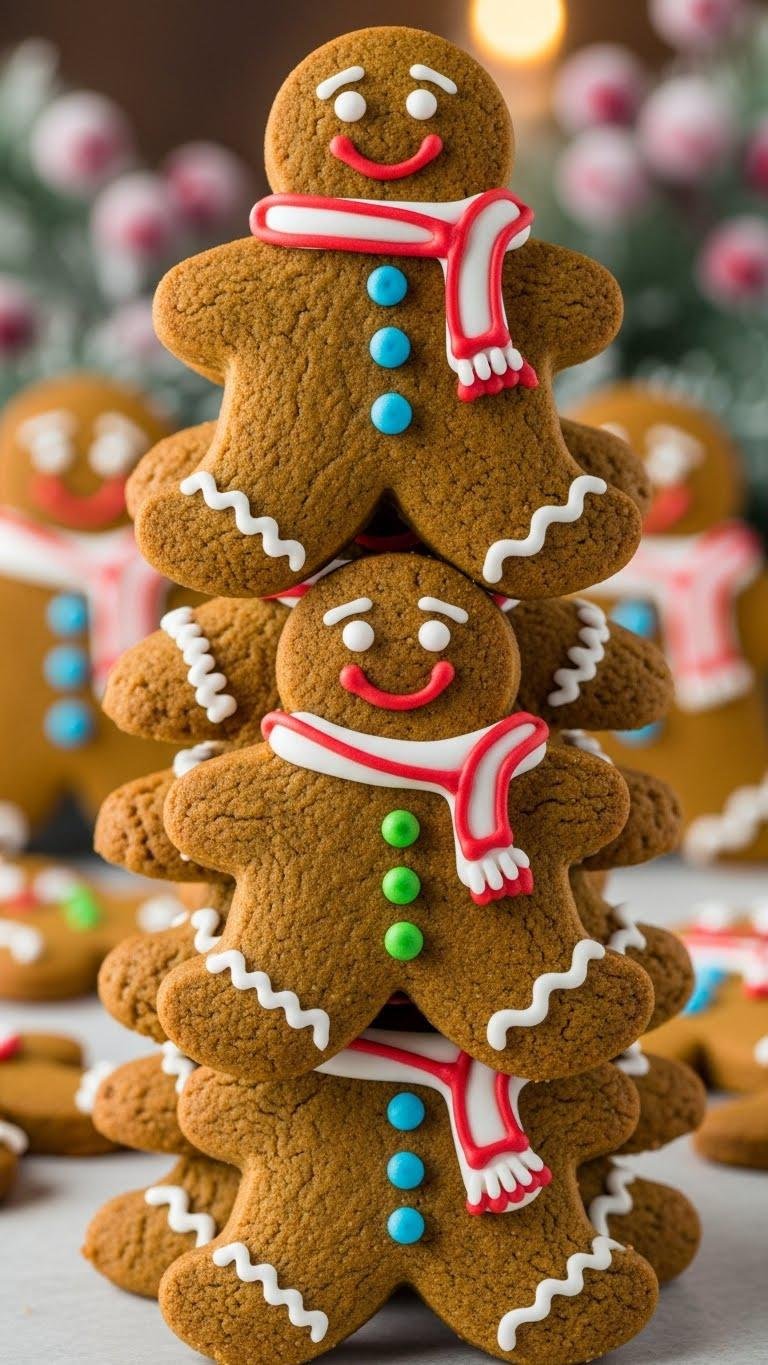
Start by rolling a firm, spice-forward gingerbread dough to a consistent 1/4-inch thickness so each layer stacks evenly. You cut identical silhouettes, assemble gingerbread layers with a thin dab of cozy icing between tiers, then pipe scarf embroidery with a fine tip for texture. Add precise button accents in contrasting hues. Chill briefly to set, then transport and display freely.
Mini Wreaths With Piped Berries
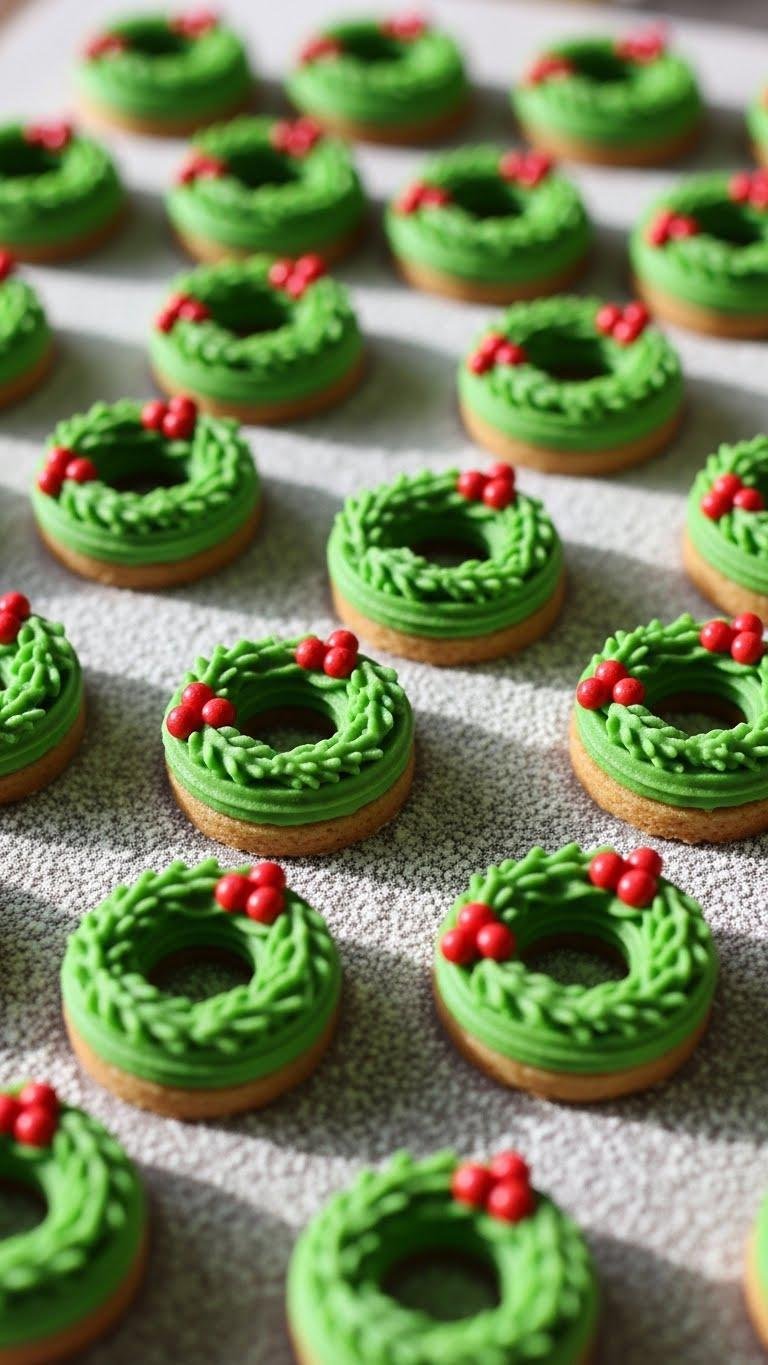
Often, you’ll pipe tiny rings of evergreen icing around a small round cutter to form crisp, uniform mini wreaths, keeping pressure steady and the tip perpendicular so each piped leaf matches its neighbor.
You then add calibrated berry piping—three bright dots per wreath—attach miniature evergreen sprigs for dimension, and finish with a light sugar dusting for frost.
Aim for consistent spacing and clean edges.
Santa Face Sugar Cookies

A steady hand and a few well-chosen tips will get you clean, expressive Santa faces on sugar cookies: pipe a smooth oval of flesh-toned icing for the face, then add a precise semicircle of red for the hat, keeping the tip perpendicular and pressure consistent to avoid ridges.
Use fluffy white icing for a defined Santa beard, dot blush for rosy cheeks, paint tiny eyes.
Metallic Painted Baubles
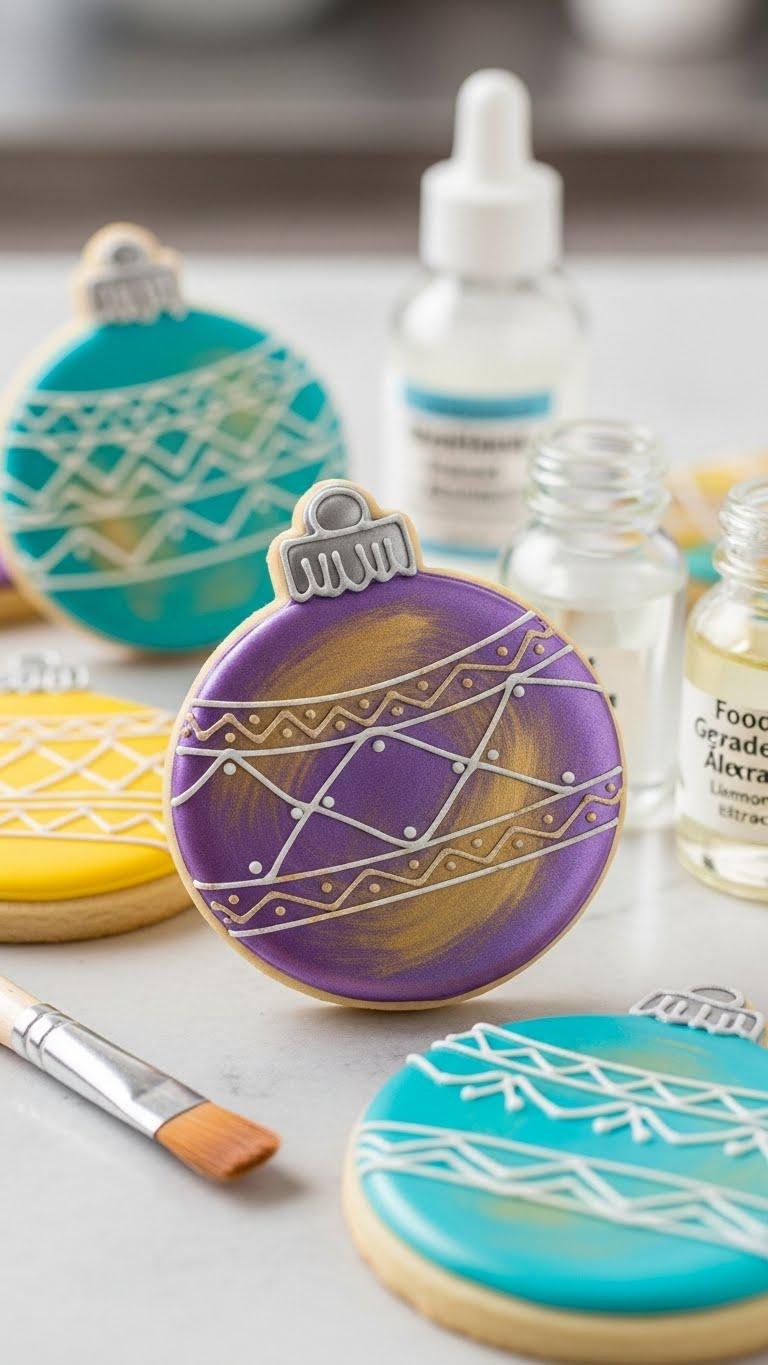
Paint metallic finishes onto sugar cookies with a small, stiff brush and edible luster dust suspended in clear food-grade alcohol or lemon extract so you can lay down smooth, reflective strokes without bleeding into wet icing.
You’ll map highlights, shadow, and seam lines using metallic brushwork and bauble stencils, working quickly in controlled layers so each ornament reads dimensional, restrained, and ready to display.
Cookie Garland Ornaments With Holes
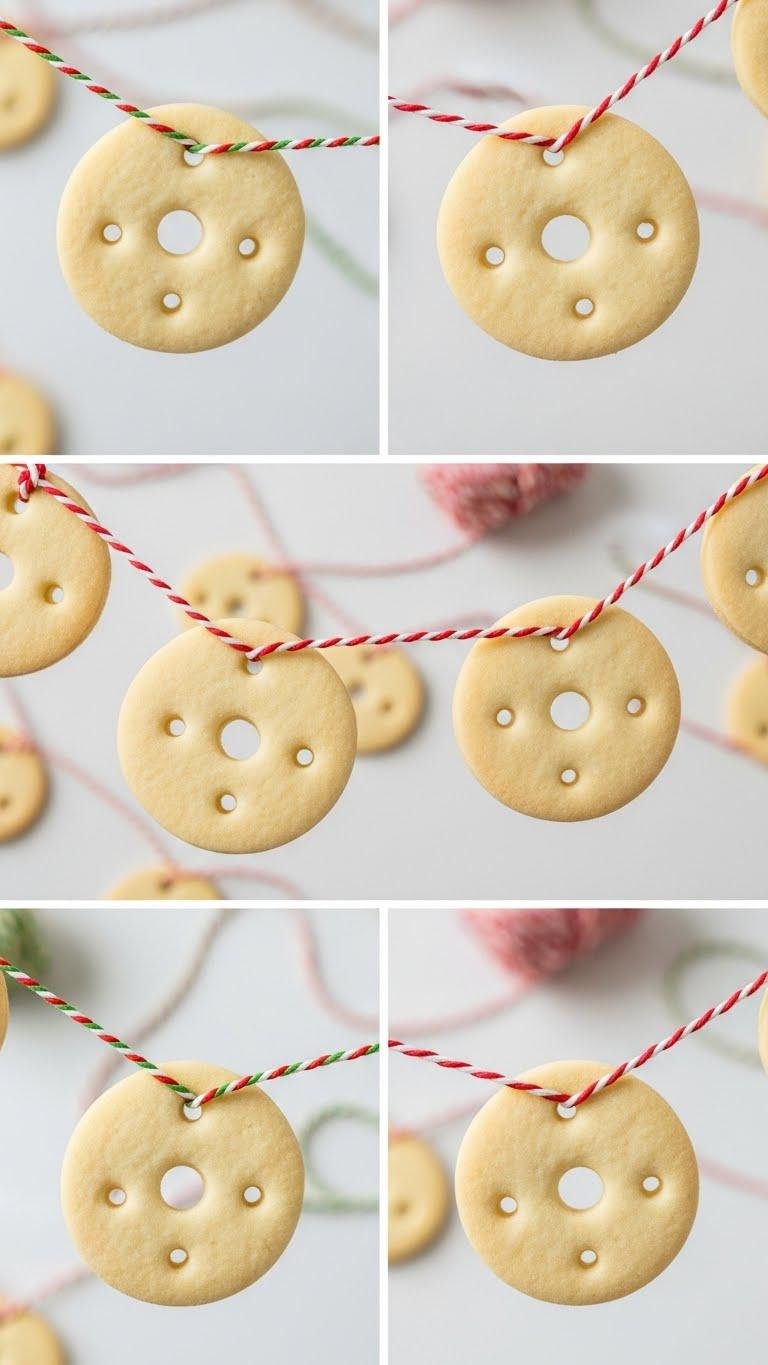
Thread small sugar-cookie ornaments through baker’s twine to make a striking edible garland that hangs flat and won’t twist, but first you’ll need to plan hole placement, dough thickness, and baking technique so each cookie keeps its shape and center hole intact.
You’ll use beaded stringing methods, reinforce holes with royal icing, and mix in lightweight claytags for durable, decorative spacing and minimalist freedom.
Elegant Lace-Patterned Trees
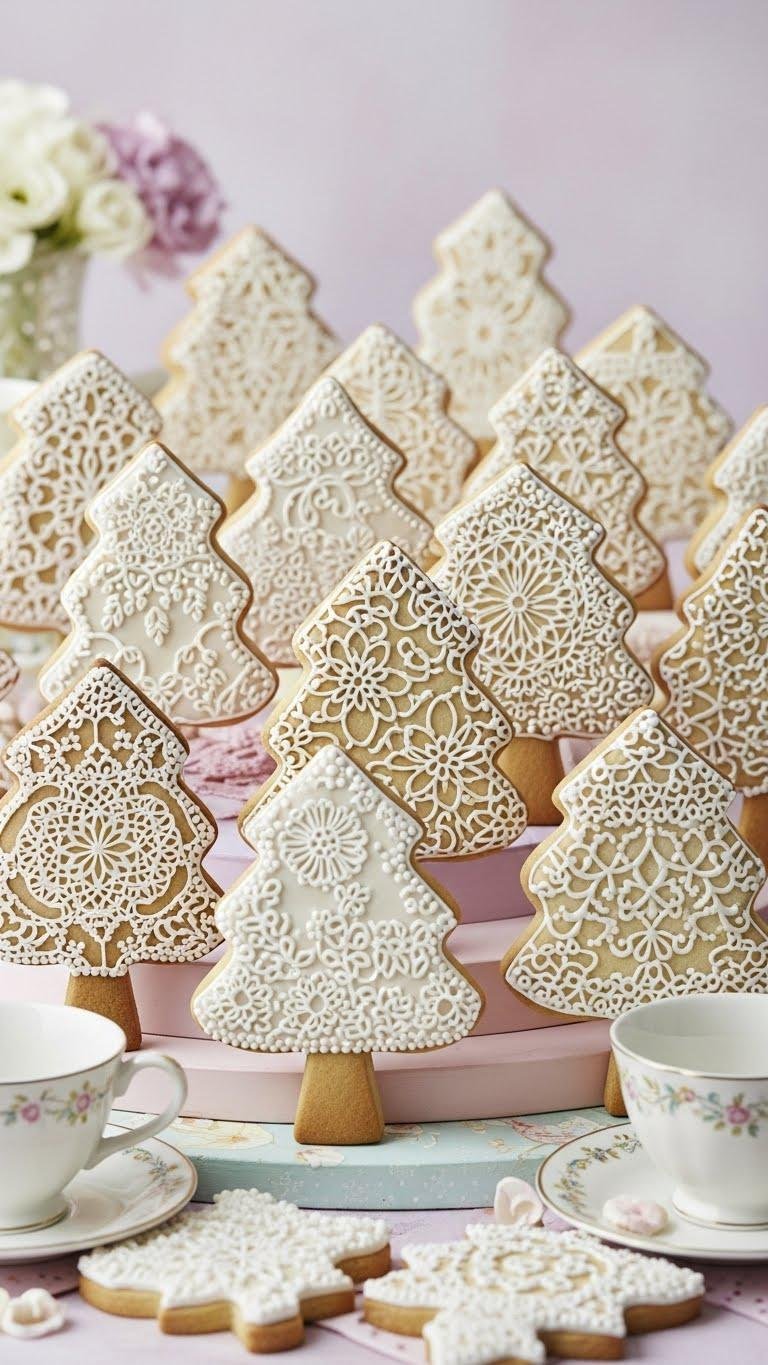
Often you’ll start by tracing a cookie-tree outline onto chilled dough, then cut delicate lace patterns with a combination of small cutters and a fine-tipped paring knife so the negative space stays crisp through baking.
You’ll use icing stencils and delicate piped borders to define filigree silhouettes, finishing tea party trees with controlled royal-icing pressure for openwork that feels airy and free.
Frosted Window Pane Bells

When you cut bell shapes from chilled dough, score a shallow window-frame outline before baking so the sugar “glass” will sit flush and avoid spreading. You’ll pour crushed hard candy into recessed panes to form stained glass centers, controlling heat and cooling for clarity.
Once set, brush a thin sugar gloss finish and pipe crisp icing edges, letting each bell retain clean, liberated silhouettes.
Candy-Accented Stockings

Start by cutting stocking shapes from chilled dough that’s been rolled to an even 1/4-inch thickness, then press shallow wells where candy accents will sit so the pieces finish flush with the cookie surface.
You’ll place a mini stocking outline, set a candy cuff into its well, add peppermint trim along the top, and embed a sprinkle heel for crisp, liberated designs that photograph cleanly.
Two-Tone Swirl Candy Canes
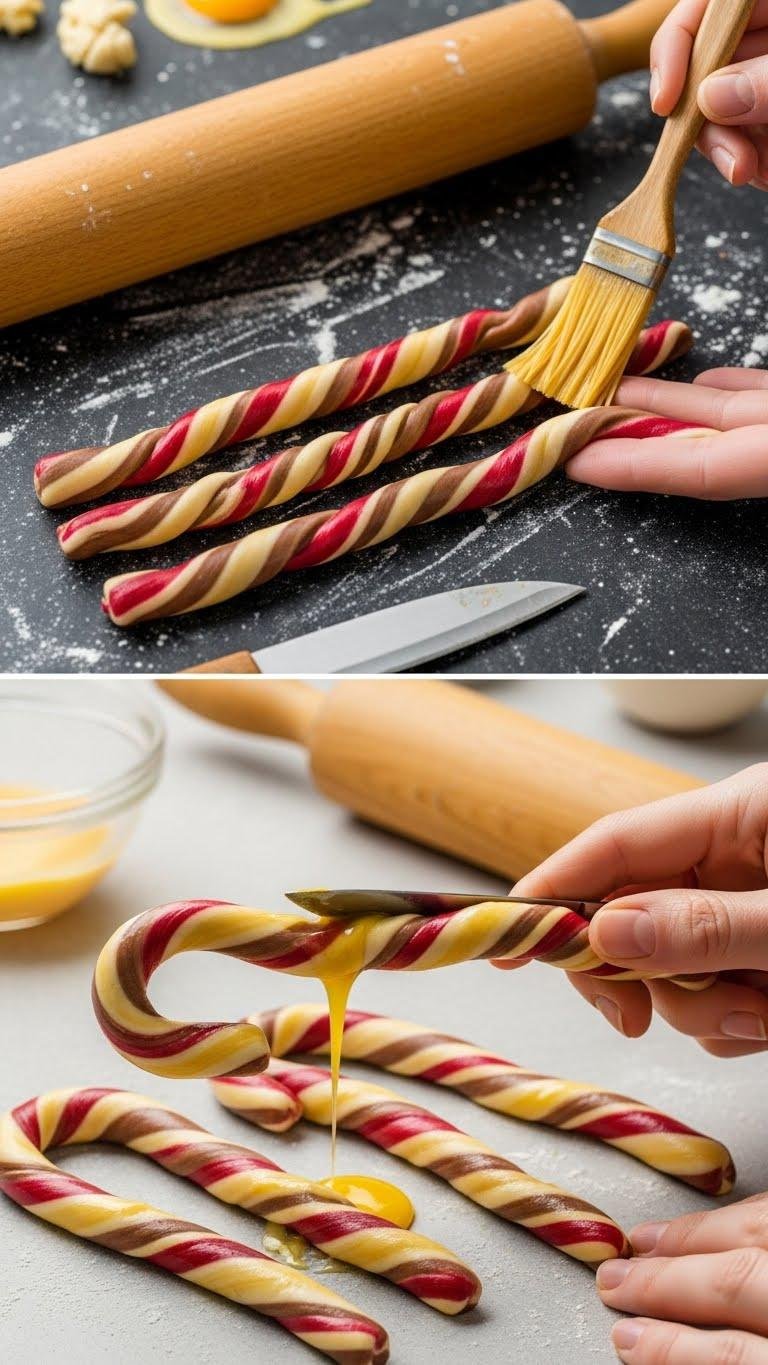
Roll two contrasting dough colors into equal ropes and press them together so their seams align before twisting; this guarantees a clean, even two-tone spiral with consistent stripe width. You’ll shape precise striped spirals, trim ends, and curve hooks to replicate vintage canes. Use controlled pressure for uniform peppermint patterns, finishing with a light egg wash. This candy art feels liberated, exact, and intentional.
Snowy Pinecone Textured Cookies

Often you’ll press overlapping teardrop-shaped scales into a butter cookie base to mimic a pinecone’s layered texture, using a small offset spatula or the rounded end of a piping tip for consistent depth and spacing. You’ll dust tips with icing sugar, pipe pine scented frosting into crevices, and score a clean pinecone silhouette before a light snowflake dusting to finish crisp, liberated designs.
Festive Plaid Squares
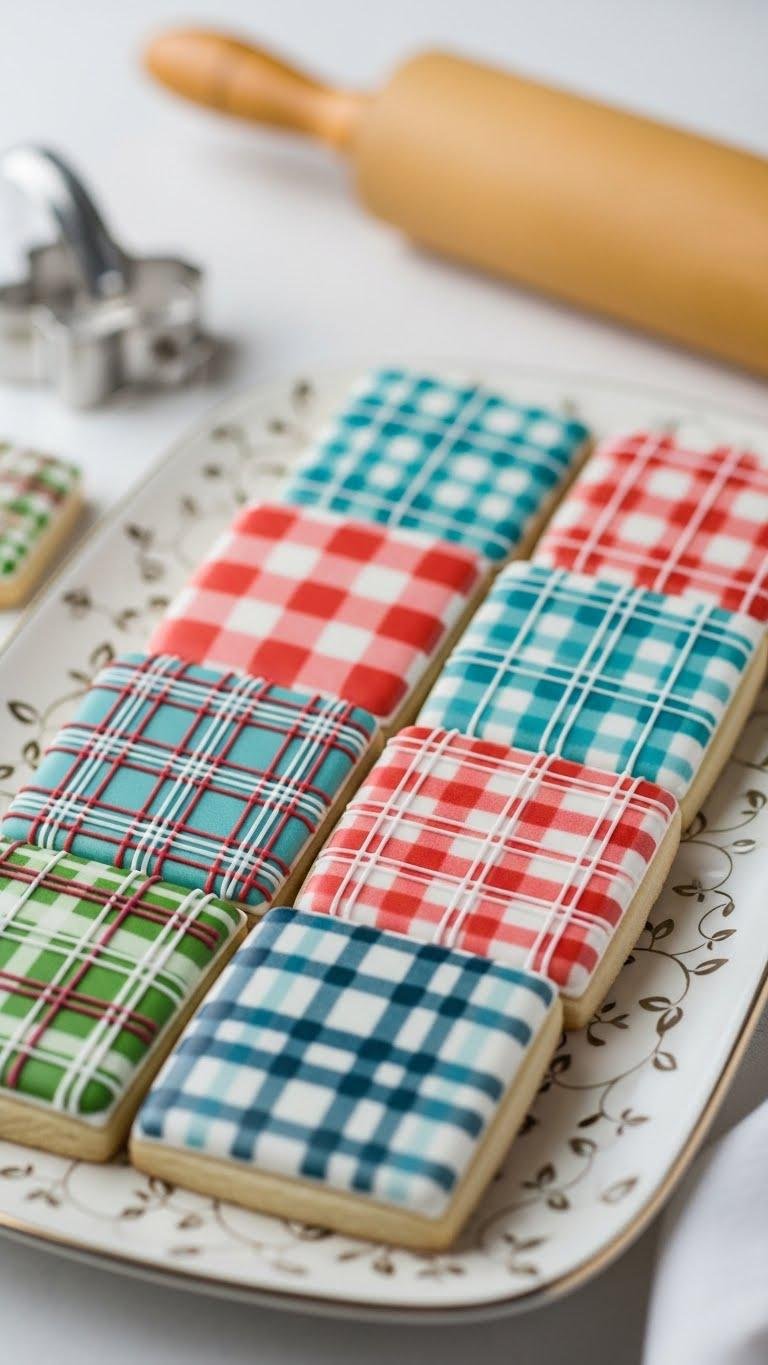
Usually you’ll begin by cutting equal squares from a sturdy sugar-cookie dough so the grid lines sit crisp and flat, then chill them briefly to keep their edges sharp during decorating. You’ll pipe thin royal-icing base, mask measured gingham motifs with guides, then overlay perpendicular lines for tartan edges. Control pressure, spacing, and drying intervals to achieve clean, liberated geometric patterns.
Tiny Treats With Edible Gold Leaf
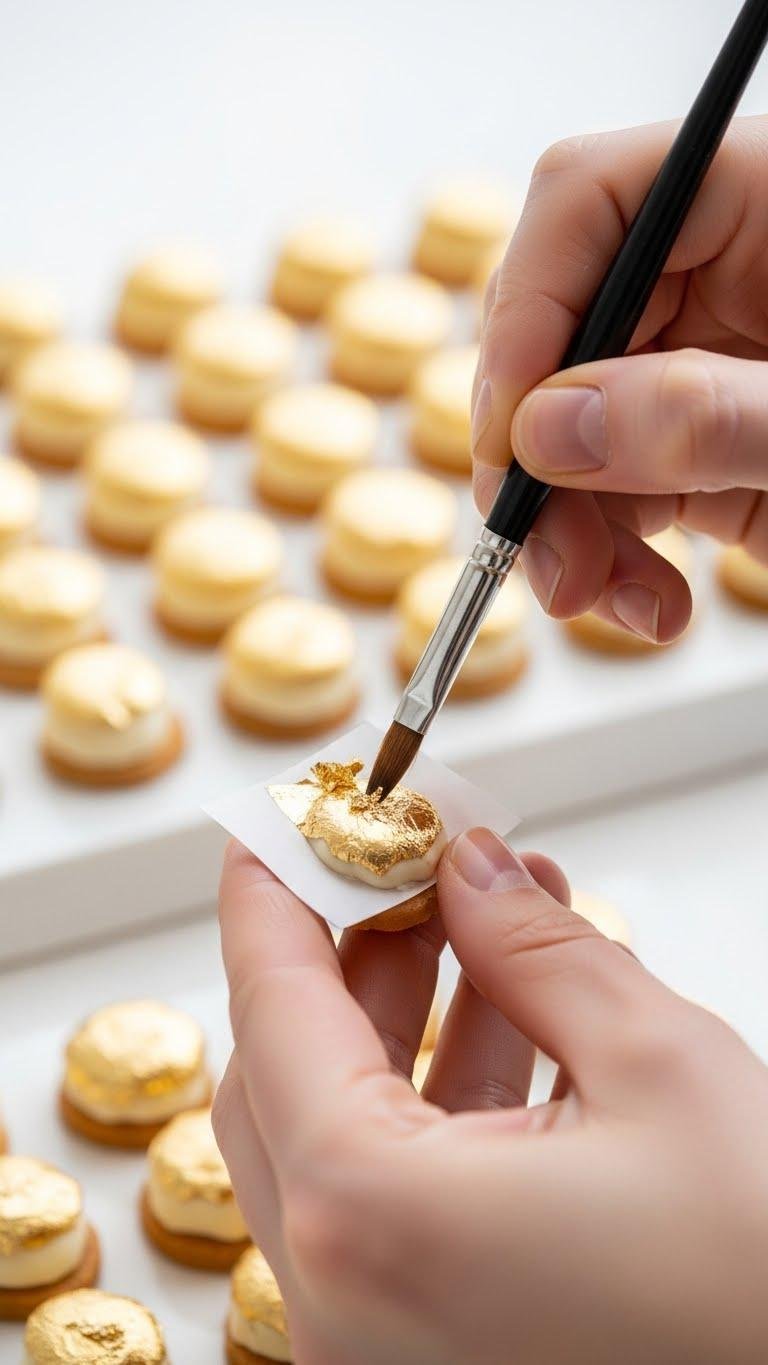
Bring a whisper of luxury to bite-sized cookies by applying ultra-thin sheets of edible gold leaf with a dry, fine-tipped brush or tweezers so the metal lays smooth without tearing.
You’ll use micro gilding techniques and edible transfer methods, executing delicate application for clean lines.
Focus on tiny leaf placement, steady hands, minimal breath, and confident strokes to free each mini treat from ordinary decor.
Snow-Covered Village Scenes
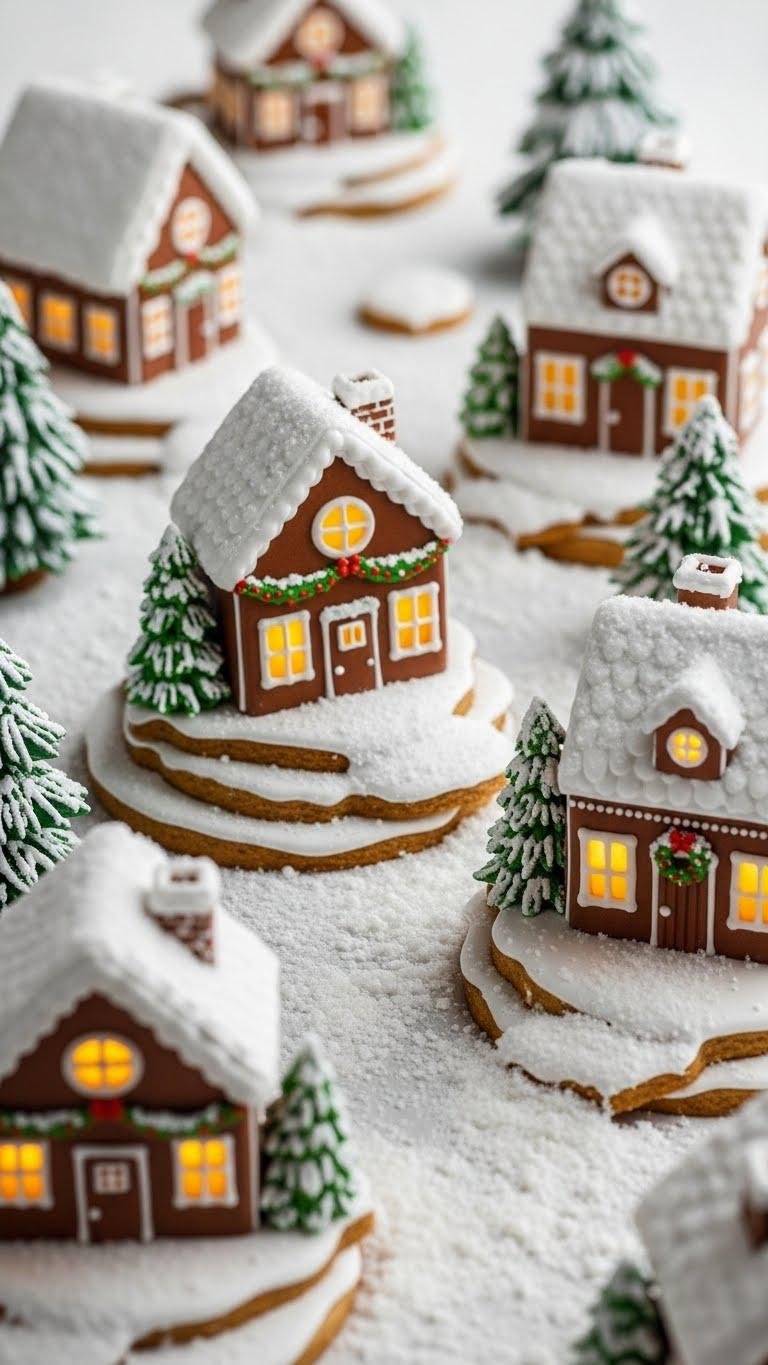
Imagine a miniature village dusted in sugar snow, where you’ll layer royal icing, fondant cutouts, and carefully piped details to build crisp rooftops, frosted trees, and glowing windows.
You’ll map an iced village layout, cut miniature cottages, and use stiff icing for texture.
Work in stages, cure layers, and apply fine brushes for shadow and light so each cookie reads like a tiny scene.
Textured Knit Sweater Cookies

Start by sketching the sweater silhouette on paper and translate those proportions to your cookie cutter so the stitch patterns sit in the right places. You’ll pipe cozy cablework with consistent tension, using a narrow tip for raised ribs. Score sweater seams before drying, vary icing viscosity for depth, and add tiny ribbed mittens motifs at cuffs so each cookie feels handcrafted and free-form yet precise.
Peppermint Twist Ring Cookies
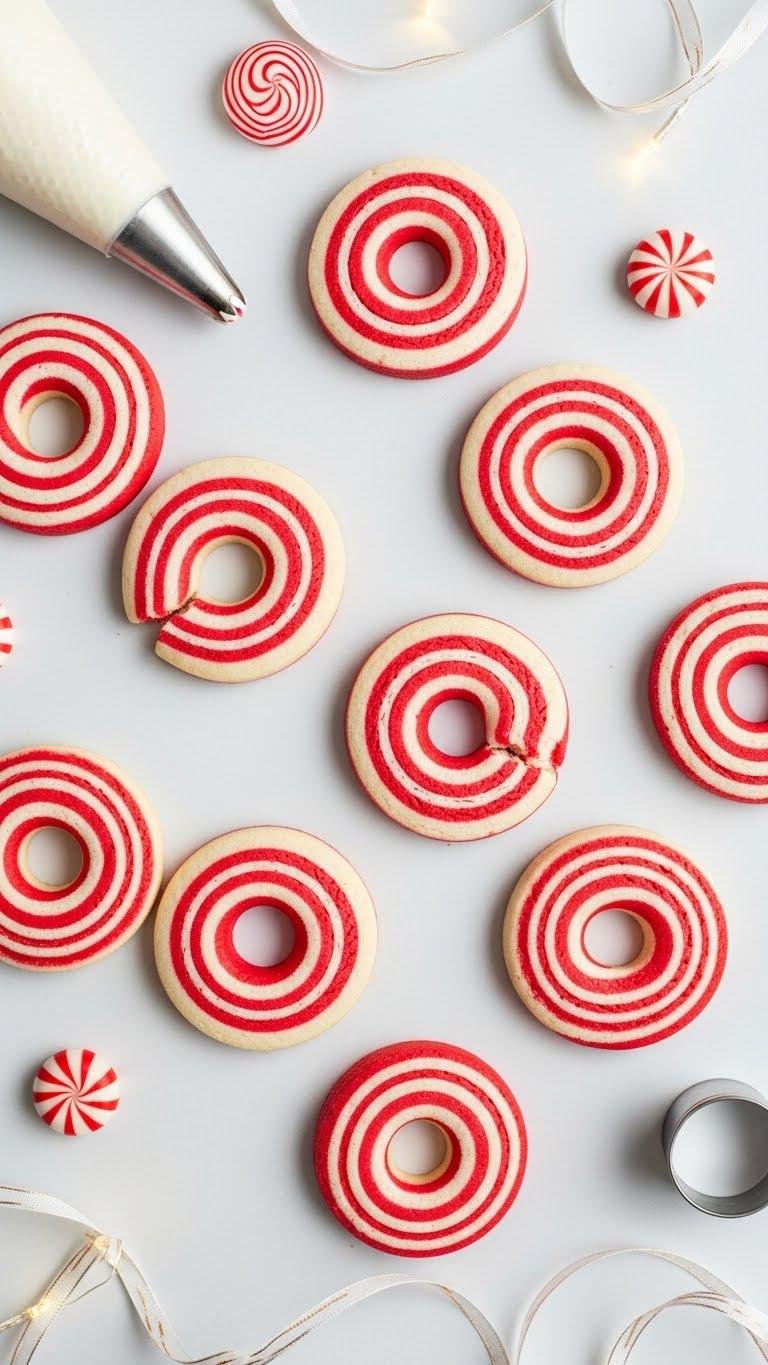
After tracing sweater proportions onto paper and practicing cable tension, shift focus to circular geometry and clean line work for Peppermint Twist Ring Cookies. You’ll calibrate cutter diameter, pipe consistent concentric bands, and rotate red and white to form a precise peppermint swirl. Assemble rings as symmetrical cookie centerpieces, leaving negative space for ribbon or light—your controlled, liberated design speaks in measured strokes.
Nutcracker Character Faces
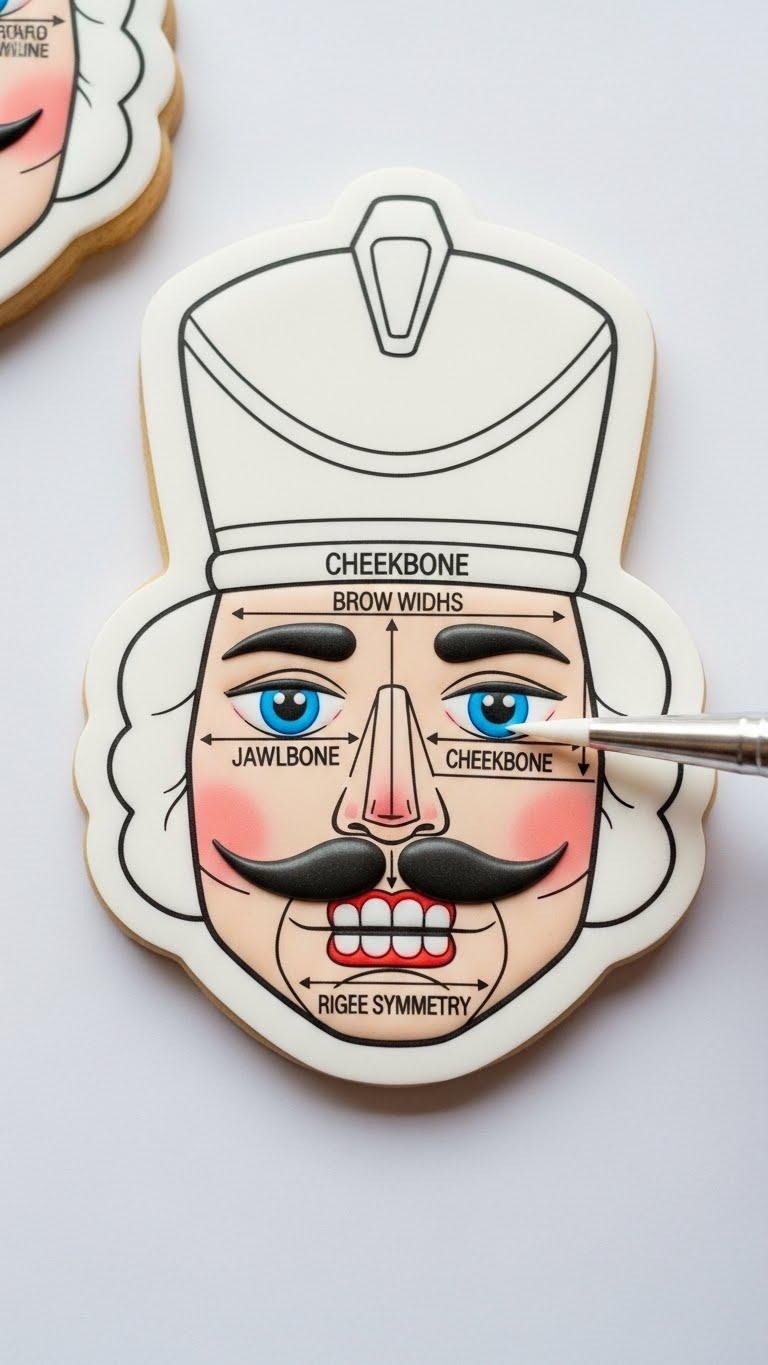
Nutcracker faces demand precise proportioning and steady handwork: map out jawline, cheekbone, and brow widths on your cookie template, then transfer those guides to royal icing layers so each facial plane reads clearly. You’ll sculpt nutcracker expressions with measured strokes, suggest a wooden soldier’s rigid symmetry, add painted cheekbones for depth, and finish with crisp, tiny mustaches — efficient, controlled, liberating.
Minimalist Scandinavian Shapes

Once you’ve mastered the measured symmetry and crisp lines of a nutcracker face, shift your focus to Minimalist Scandinavian Shapes, where restraint and geometry rule.
You’ll cut precise Nordic silhouettes—circles, triangles, elongated ovals—then apply controlled icing strokes. Use muted palettes, thin brushes, and steady hands to suggest texture and negative space. The result: liberated minimalism that reads modern, calm, intentional.
Holiday Cookie Gift Stackables
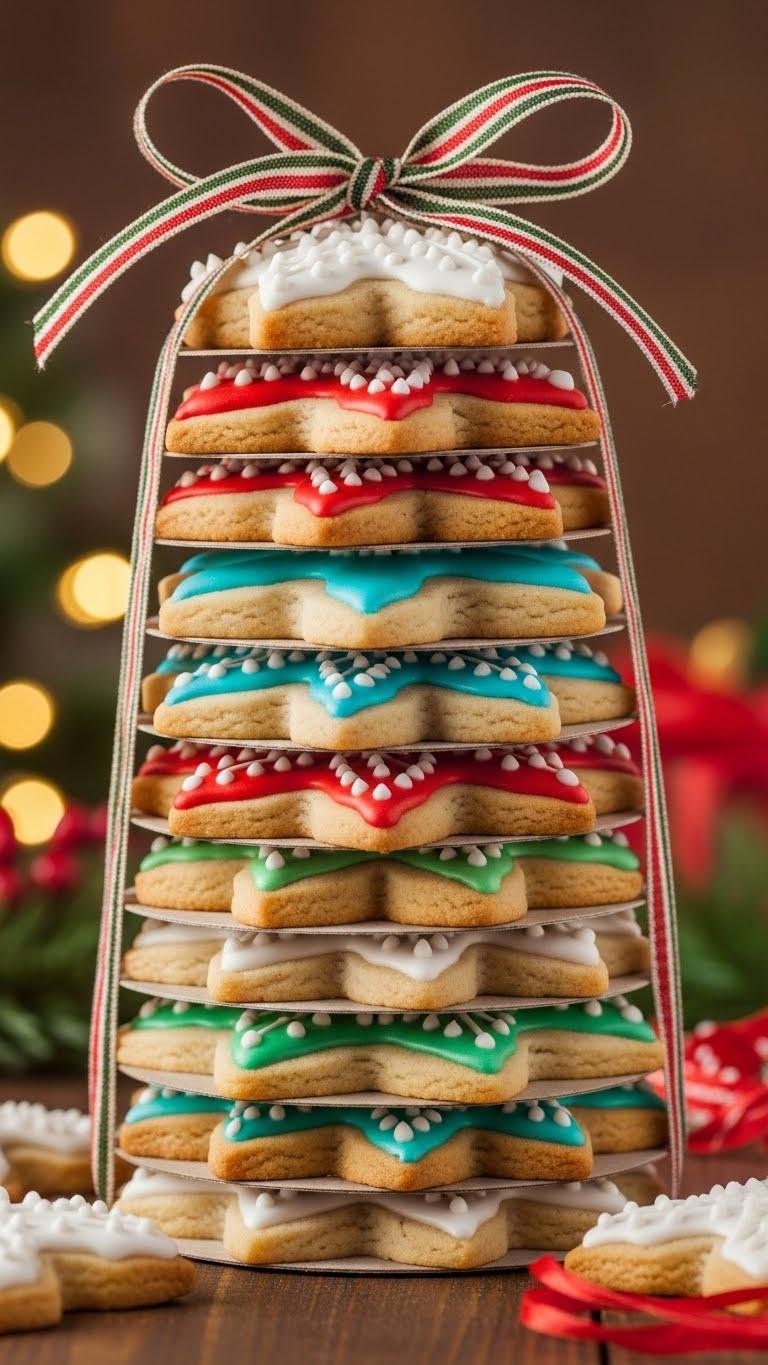
For gifting, think vertically: design cookies that stack securely while looking intentional. You’ll cut consistent diameters, chill layers, and pipe thin royal-icing rims to lock tiers. Create mini stackables in graduated sizes, alternate textures for grip, and finish with ribbon tied towers for transport and display.
Pack with stiff cardboard separators; label contents and balance weight to preserve form and freedom of presentation.