
You’ll find 27 quick, stylish tag ideas that make every gift feel personal without much fuss. Follow simple, photo-rich steps for gingerbread cutouts, washi-stripe patterns, embossed metallics, and keepsake wooden tags. Each design lists supplies, shortcuts, and little finishing touches like twine or sequins. Try one or mix several—pick a favorite and keep going to see how small details change the whole presentation.
Gingerbread House Cutout Tags

Starting with a simple template will make your gingerbread house cutout tags quick and fun: trace a small house shape onto heavy kraft or cardstock, cut it out with a craft knife or sharp scissors, and punch a hole at the roof peak for twine. Then stamp gingerbread silhouettes, brush cinnamon for spiced scented tags, add names, and snap bright photos.
Snowflake Pen-Detailed Tags
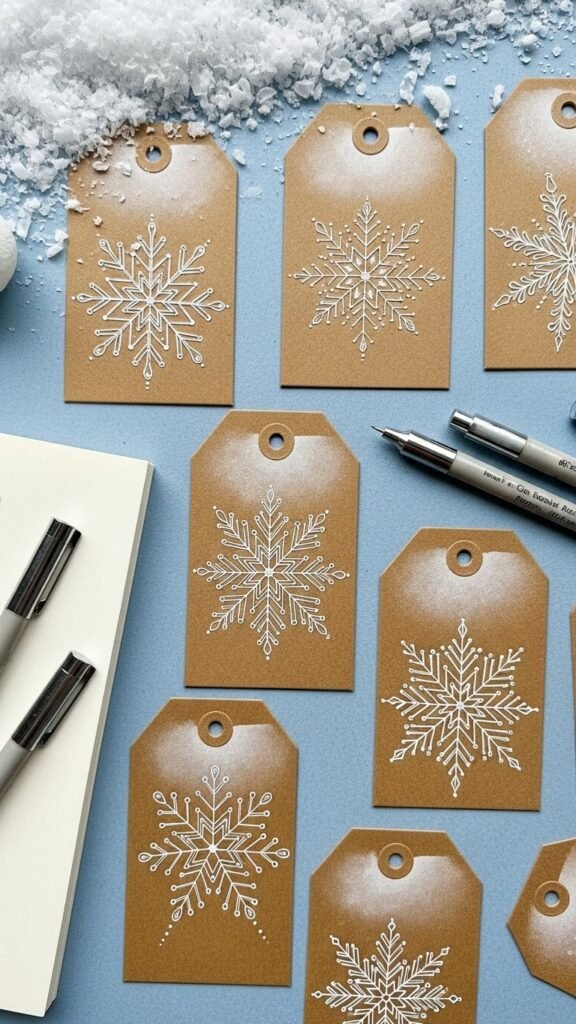
Using a fine-tip white or metallic gel pen, you’ll give simple kraft or cardstock tags an elegant, wintry makeover with delicate snowflake designs; begin by lightly sketching a central dot or tiny circle, then draw symmetrical arms and add small dots and branches until each flake feels balanced. Next, layer subtle pen shading, try faux snowflake embossing with raised ink, photograph each stage, and enjoy creative freedom.
Simple Christmas Tree Triangles

Washi Tape Patterned Tags

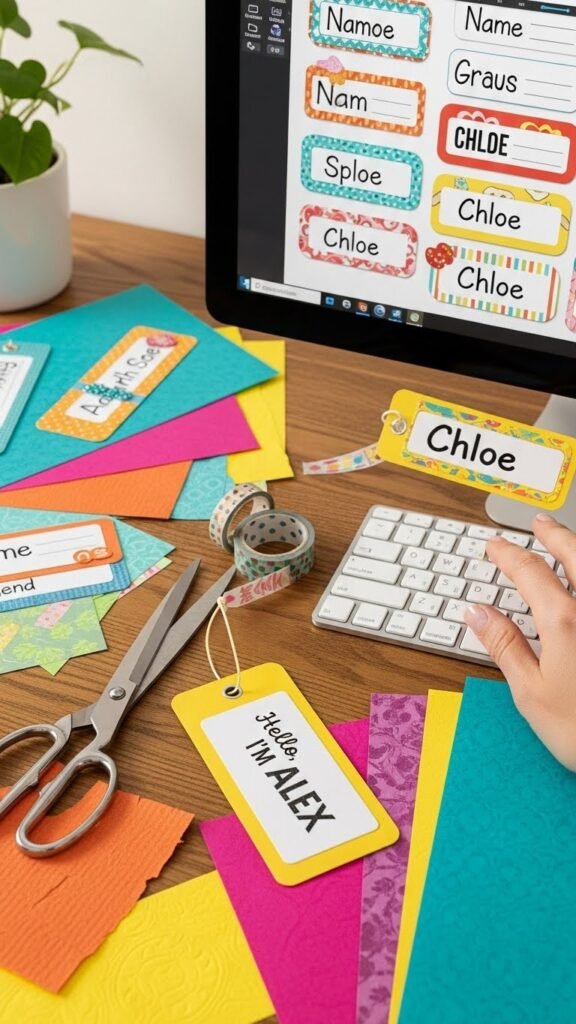
Printable Custom Name Tags
Metallic Pen Night-Sky Tags
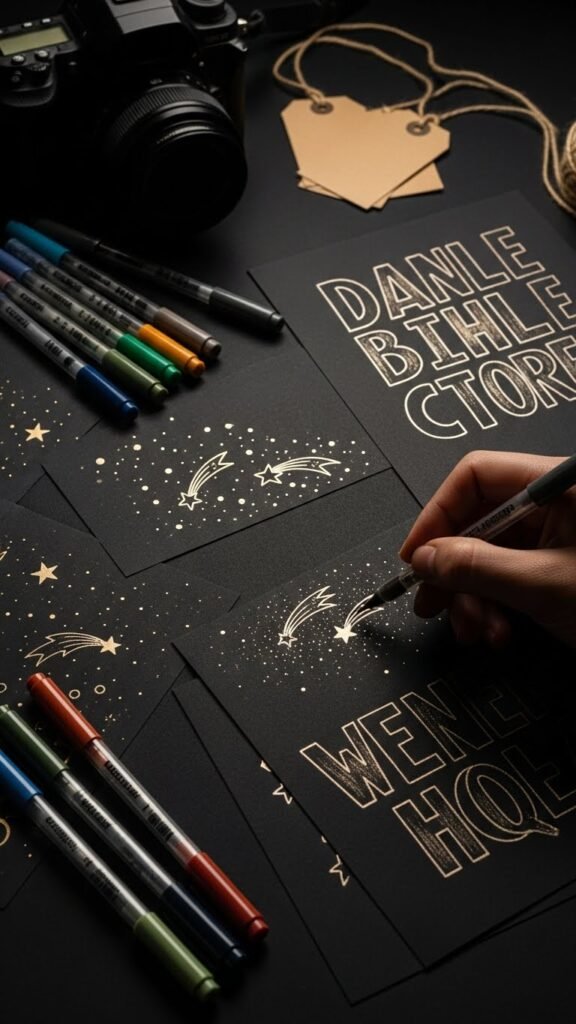
Usually you’ll start by gathering a few metallic gel pens, dark cardstock, and a steady hand—this night-sky tag technique turns simple supplies into shimmering constellations.
Trace tiny dots and shooting stars, sketch freeform midnight constellations, then add bold celestial typography for names. Photograph each step for a photo-rich tutorial.
You’ll cut tags, punch holes, and tie with twine—fast, freeing, and magical.
Kraft Paper Rustic Tags
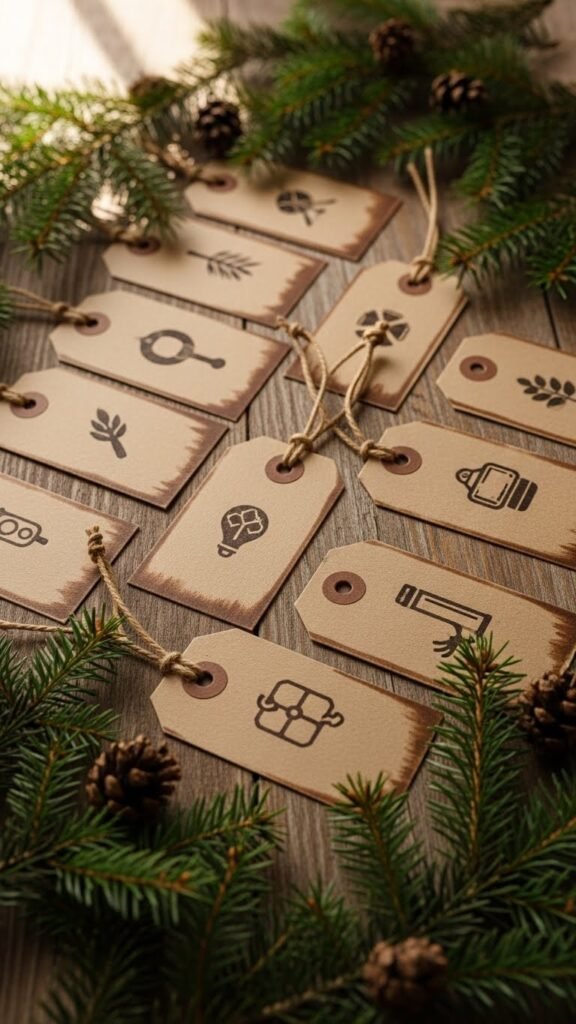
After you’ve played with shimmering inks on dark cardstock, switch to kraft paper for a warm, rustic look that’s just as quick to make and equally photogenic.
Cut recycled kraft tags, stamp simple icons, and edge with brown ink. Punch a hole, knot twine accents, and add a bold name. Photograph flat, styled with pine sprigs for free-spirited, cozy shots.
Layered Paper Ornament Tags
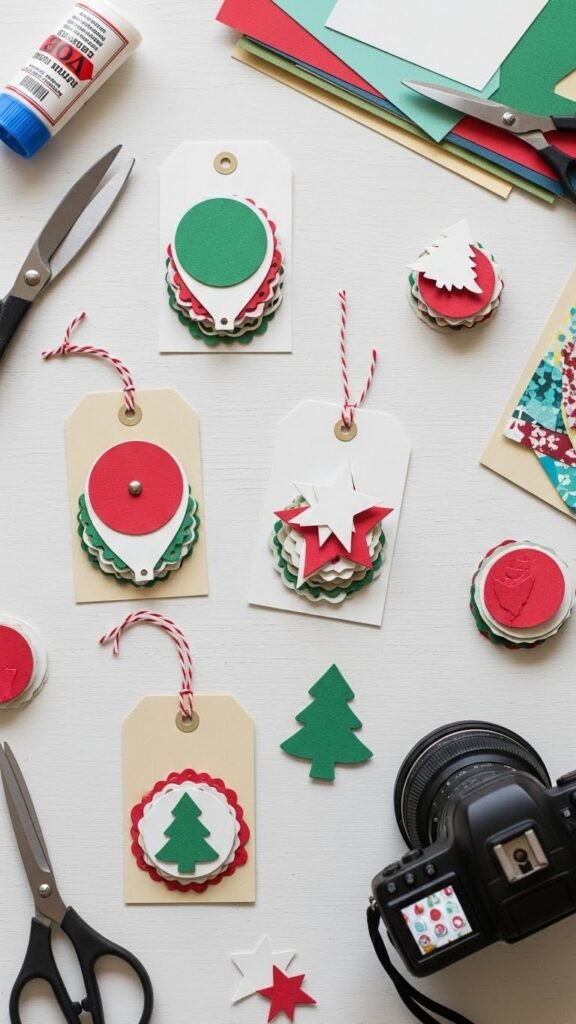
Build layered paper ornament tags by stacking cut shapes for instant depth and charm—think small circles, scalloped stars, or tiny tree silhouettes layered with contrasting cardstock or patterned scraps. You’ll trace, cut, and glue in simple steps: choose colors, offset layers, add a tiny brad or string. Photograph each stage for reference. Embrace paper layering and playful mini ornamentation to personalize gifts freely.
Minimalist Single-Color Tags
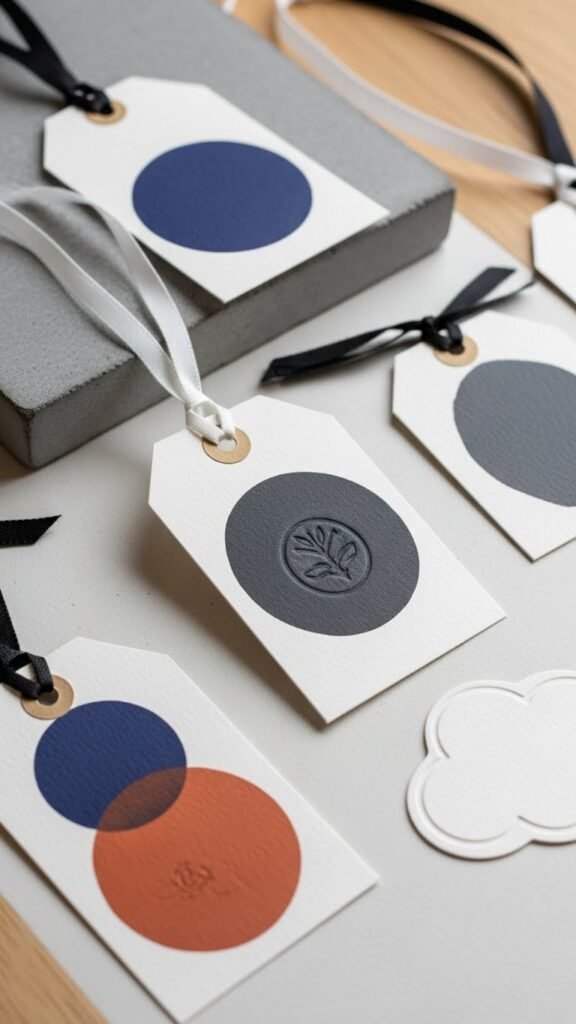
For a clean, modern look, choose one bold pigment and let simple shapes do the talking — you’ll get striking tags with just paint, paper, and a steady hand. Cut matte cardstock, paint a block or stripe, stamp a single stamp motif, or add a minimalist diecut. Photograph each step, tie with monochrome ribbon, and enjoy the freedom of restrained, handmade style.
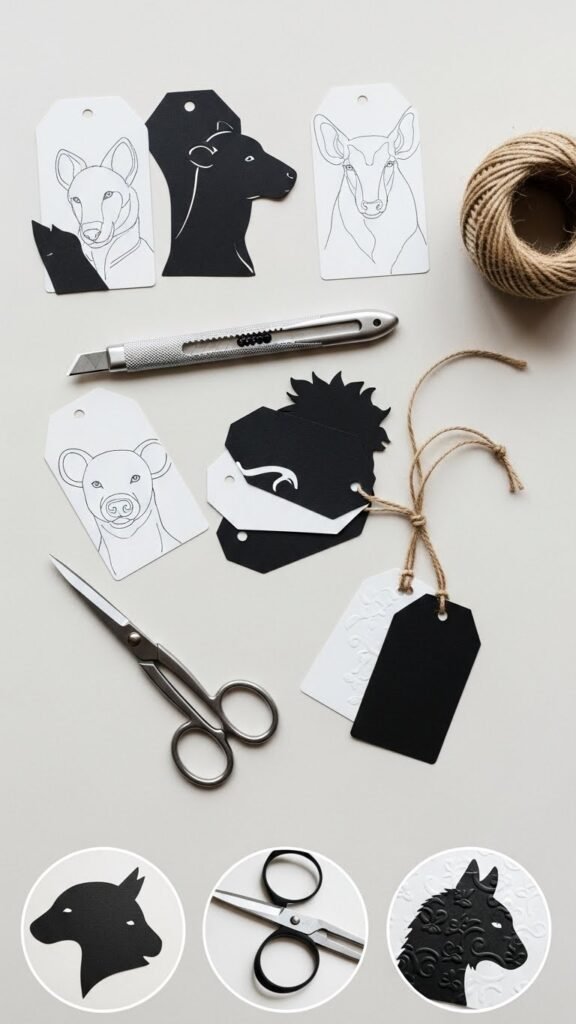
Animal Silhouette Tags
Vintage Postcard Style Tags
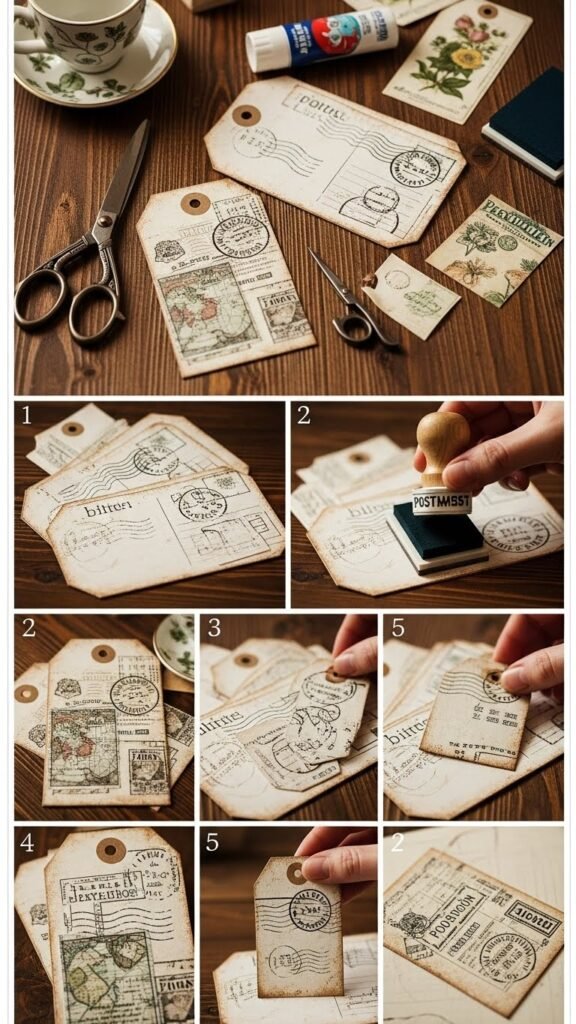
When you want tags with old-world charm, start by gathering kraft or cream cardstock, tea-stain paper, and a few vintage ephemera prints so you can layer textures and typography like a real postcard. Cut rectangles, distress edges, stamp faux postmarks, and glue layered pieces. Photograph each step for a photo-rich guide. You’ll evoke travel nostalgia while keeping designs free, simple, and bold.
Twine and Button Accent Tags
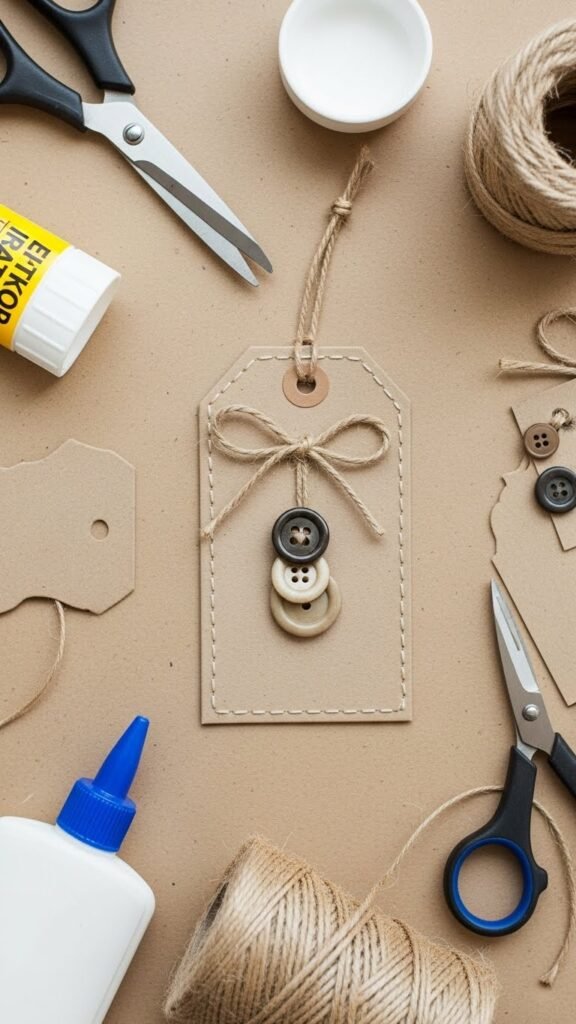
Tie a simple knot and you’ve already got the look: twine and button accent tags bring homespun charm to any gift with minimal supplies and maximum visual impact.
You’ll wrap rustic twine, layer a button stack, secure with a tiny bow, and add stitched edging for texture.
Photograph each step—cut tag, thread, knot, glue—for a free-spirited, easy tutorial.
Stamped Snow Globe Tags
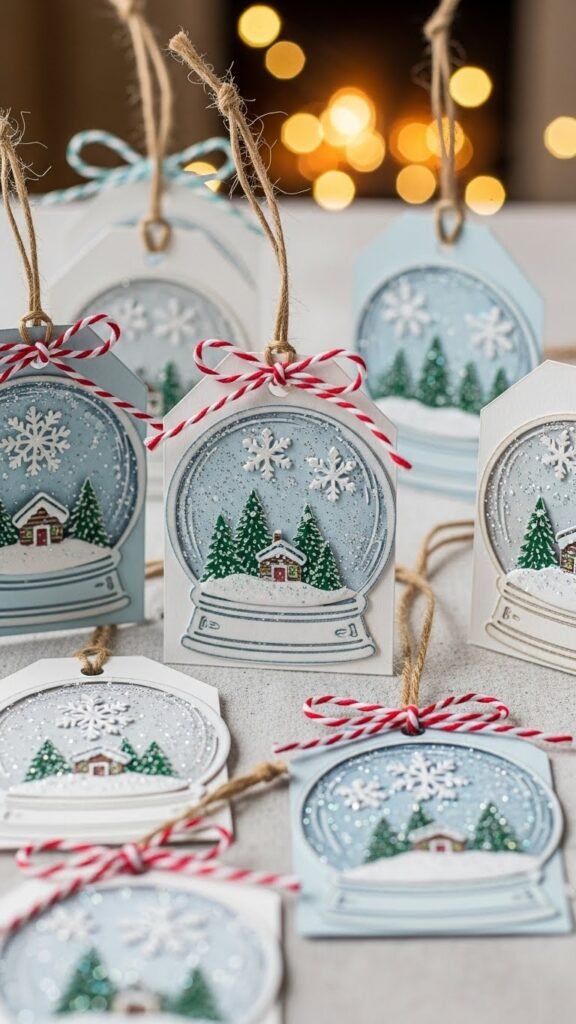
If you want a quick, photo-friendly project that looks intricate, stamped snow globe tags are perfect: you’ll stamp a globe outline, add a tiny winter scene inside, dab on glitter or faux snow, and finish with a twine hanger. You’ll use snowflake stamping, layer tiny trees or a cabin, apply glitter accents sparingly, let dry, punch a hole, and tie with relaxed flair.
Polka Dot Ornament Tags
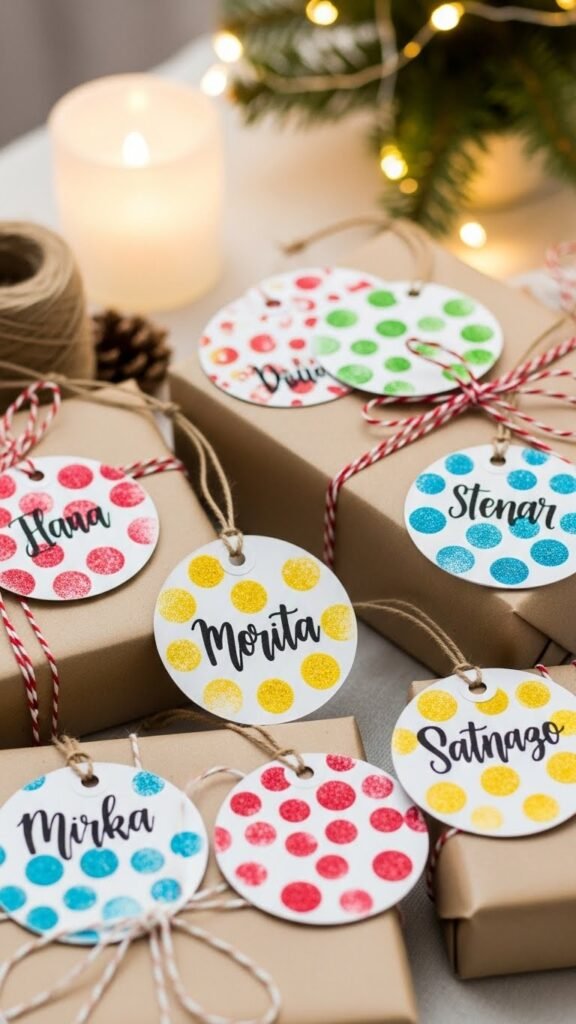
Keep the cozy handmade vibe going with playful polka dot ornament tags that photograph beautifully and come together fast. You’ll cut round tags, stamp a hand stamped polka pattern, then add glittered dots for shine. Punch a hole, thread twine, and write names in bold script. Arrange tags on presents for a free-spirited, photo-ready finish that’s quick and satisfying.
Chalkboard Paint Message Tags
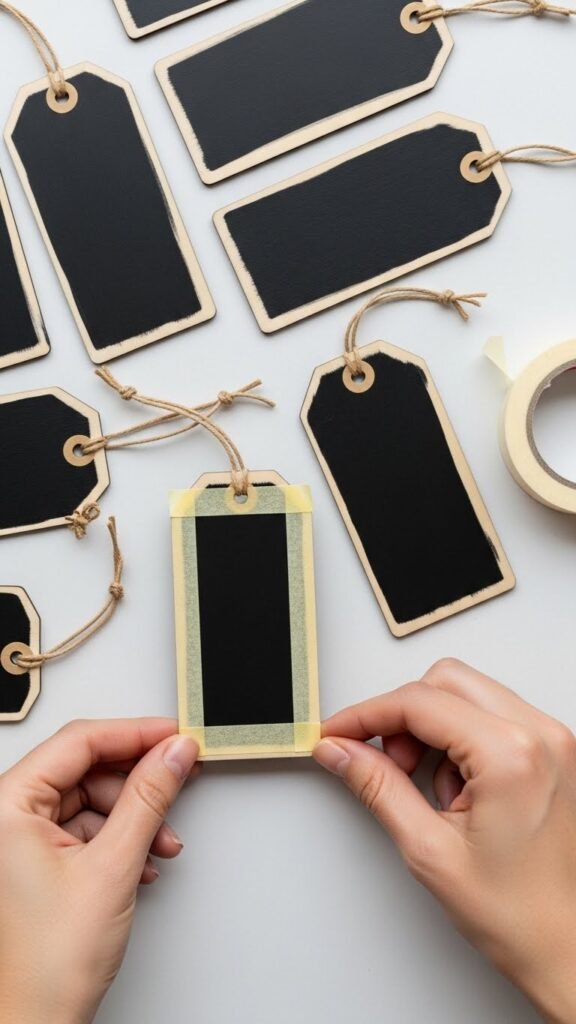
Transform plain tags into writable keepsakes with a quick coat of chalkboard paint that lets you personalize gifts right up to the last minute. Start by sanding, tape edges, paint two thin coats. Photograph each step for a photo-rich guide. Let dry, write messages, and seal if desired. Add chalkboard charm by pairing with twine or magnetic backing for fridge-ready mementos.
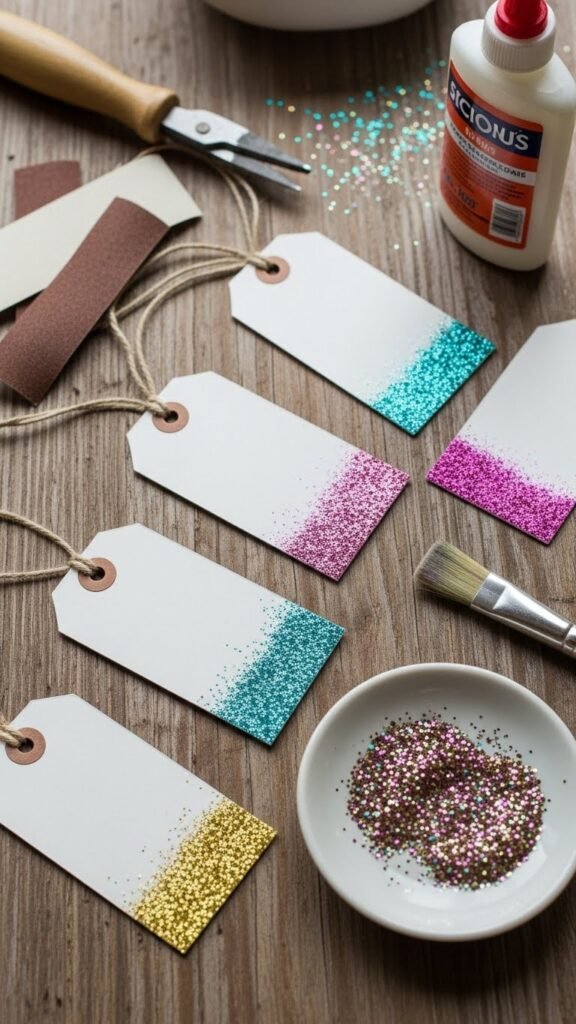
Glitter-Dipped Edge Tags
Ribbon-Bow Topped Tags

Tie a simple bow and you’ll see how quickly a plain tag becomes picture-perfect — ribbon-bow topped tags add instant charm and a tactile finish that looks great in photos. Choose satin loops for sleek shine or wired bows for sculpted volume. Step-by-step: cut tag, punch hole, thread ribbon, tie bow, trim tails. Snap bright photos and let your gifts reflect your free, creative spirit.
Geometric Modern Tree Tags
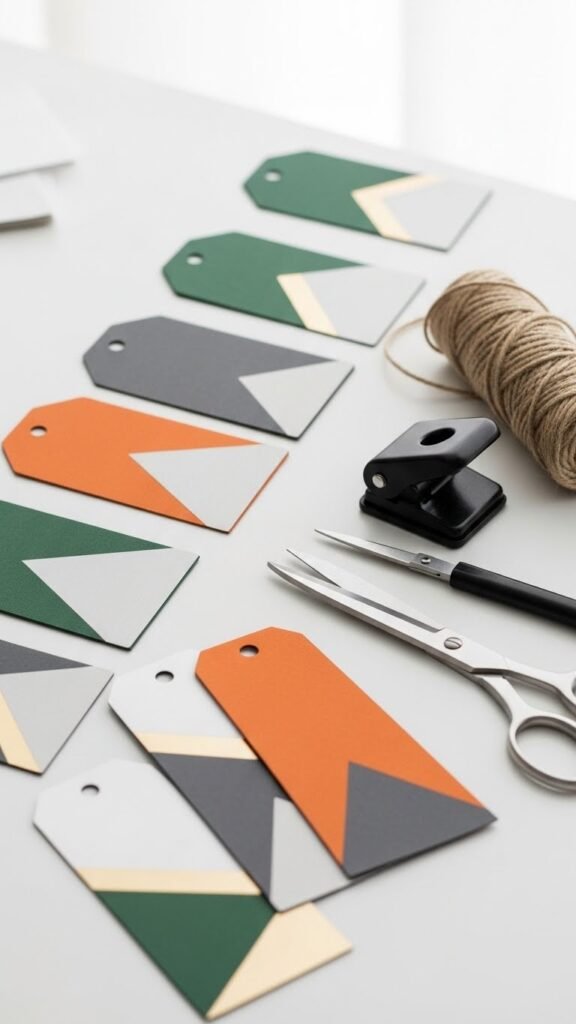
Think clean lines and bold shapes: geometric modern tree tags give your gifts a sleek, contemporary look you can make in minutes.
You’ll trace minimalist triangles on sturdy cardstock, cut clean edges, and layer matte metallic accents for contrast.
Photograph each step for reference.
Punch a hole, add twine, and snap a final shot.
These tags feel free, simple, and sharp.
Cut-Out Window Tags
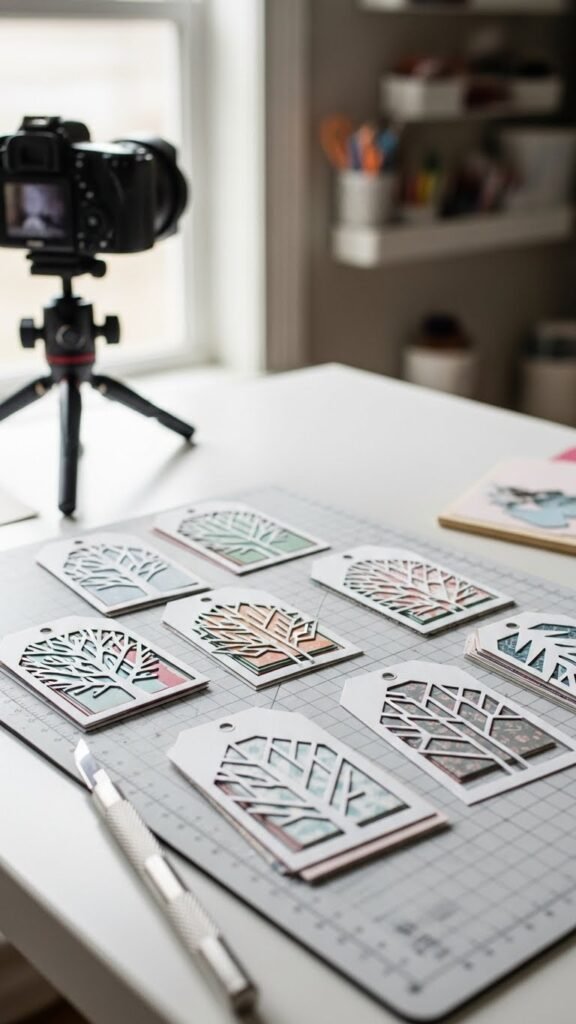
If you liked the clean angles of the geometric trees, you’ll enjoy how cut-out window tags play with negative space to add surprise and depth.
Start by sketching shapes, then cut a window with a craft knife. Layer translucent paper or patterned scraps behind layered apertures. Snap photos of each step. You’ll love the airy, liberated look these simple, bold tags create.
Botanical Sprig Stamped Tags
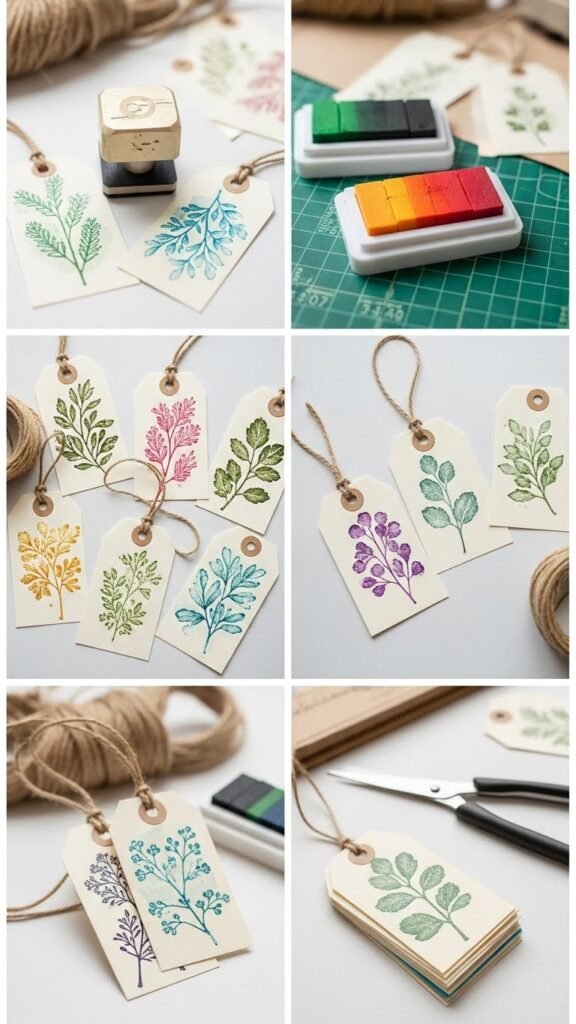
Often you’ll reach for a simple rubber stamp and a few ink pads to make botanical sprig stamped tags that feel both handmade and effortless.
Start by stamping sprigs, then use ink blending to add depth. Photograph each step for reference. Layer colors, trim tags, and tie with twine.
Optionally include herb pressing impressions for texture and a natural, free-spirited finish.
Printable Photo Keepsake Tags

Printable photo keepsake tags let you turn favorite snapshots into tiny, personal mementos you can attach to gifts, party favors, or holiday packages.
Pick photos, crop to tag size, print on heavy paper, punch a hole, and add twine.
You’ll label backs with dates or short notes.
These photo keepsake memory tokens feel freeing, visual, and effortlessly heartfelt—perfect for sharing moments.
Embossed Metallic Foil Tags
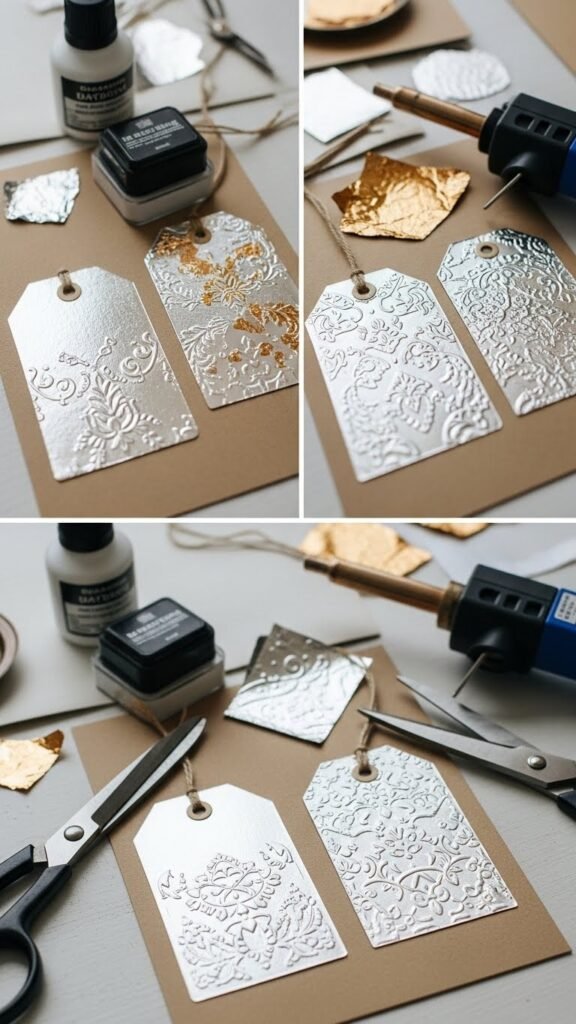
You’ll love how embossed metallic foil tags instantly lift any package—gleaming surfaces catch the light while raised patterns add a tactile, luxe finish. Start with kraft or heavy cardstock, stamp with embossing ink, sprinkle embossing powder, and use a heat embossing tool. Add foil leafing for mirror shine, trim into tags, punch a hole, and photograph each step for a free-spirited, photo-rich guide.
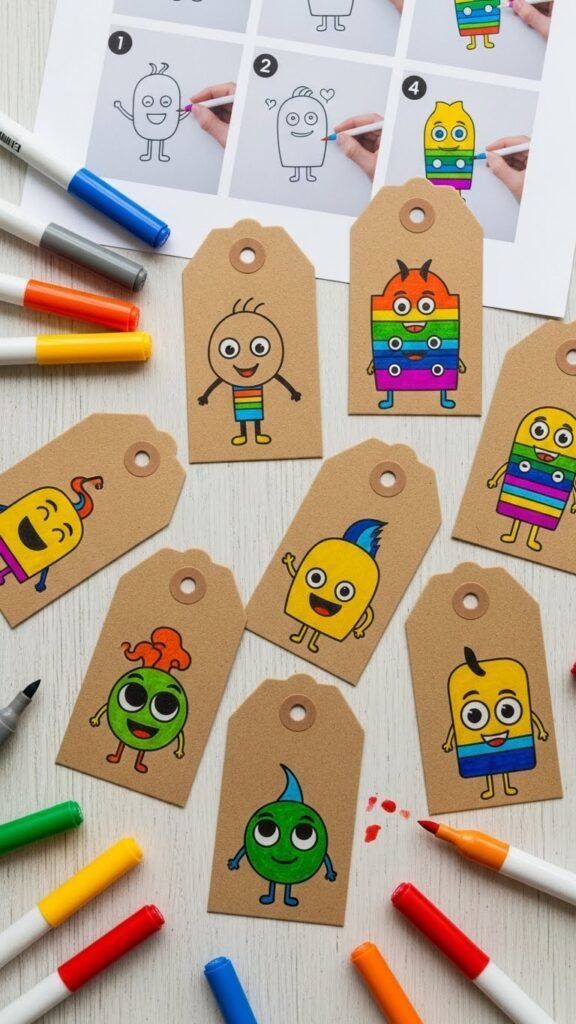
Quick Doodle Character Tags
Washi Tape Layered Stripes

Usually the easiest way to add instant color and pattern is with washi tape: grab several coordinating rolls and layer them across a kraft tag, trimming edges clean for crisp stripes.
You’ll build layered texture by overlapping tapes, try angled placement for dynamic color blocking, and cut diagonal strips for movement. Photograph each step, experiment freely, and pick combinations that feel joyful and unique.
Reusable Wooden Tag Ideas
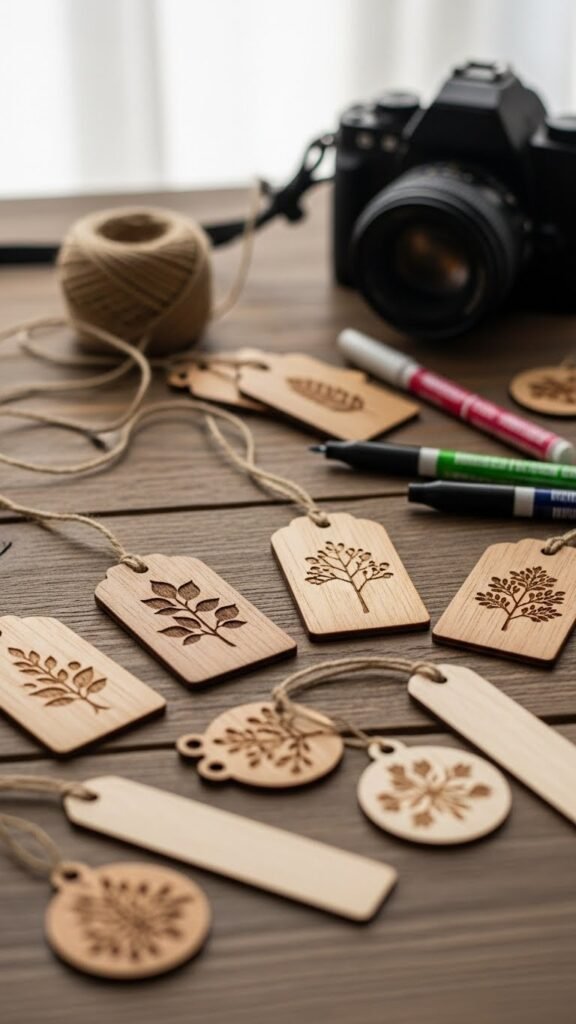
For a sustainable, photo-ready option, start with small wooden tags you can decorate, erase, and reuse season after season.
Choose smooth blanks, sand edges, then sketch names lightly. Use a fine-tip marker or paint pen so you can wipe later.
Add twine or transform extras into wooden bookmarks or engraved ornaments.
Photograph each step for your gift gallery and enjoy creative freedom.