
You’ve got boots that still fit and feel fine but look tired — you don’t have to toss them. With practical, budget-wise tricks you can clean, repair, recolor, and accessorize for a modern look without breaking the bank. I’ll walk you through smart fixes like leather paint, sole touch-ups, zipper tweaks, and easy waterproofing so your winter pair works and looks current — and you’ll be surprised how far a little effort goes.
Deep Clean and Condition Before You Start
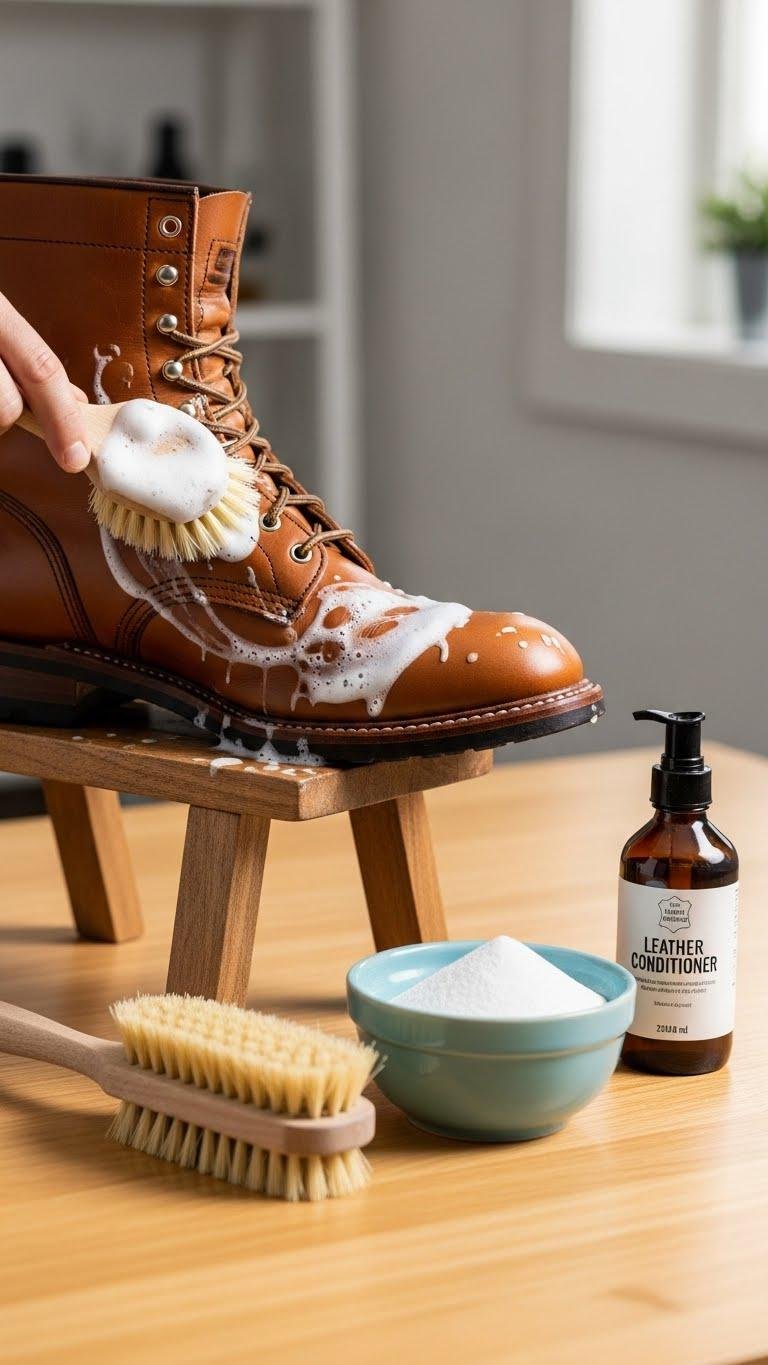
Before you redo your boots, give them a thorough clean and conditioning so your repair work actually sticks and looks professional. You’ll strip salt and grime, tackle odor elimination with baking soda or specialized spray, and condition leather to avoid cracking. Scrub soles for sole whitening or apply a mild bleach alternative. These prep steps keep your makeover sharp and let you roam freely.
Paint Leather Boots for a Total Color Change
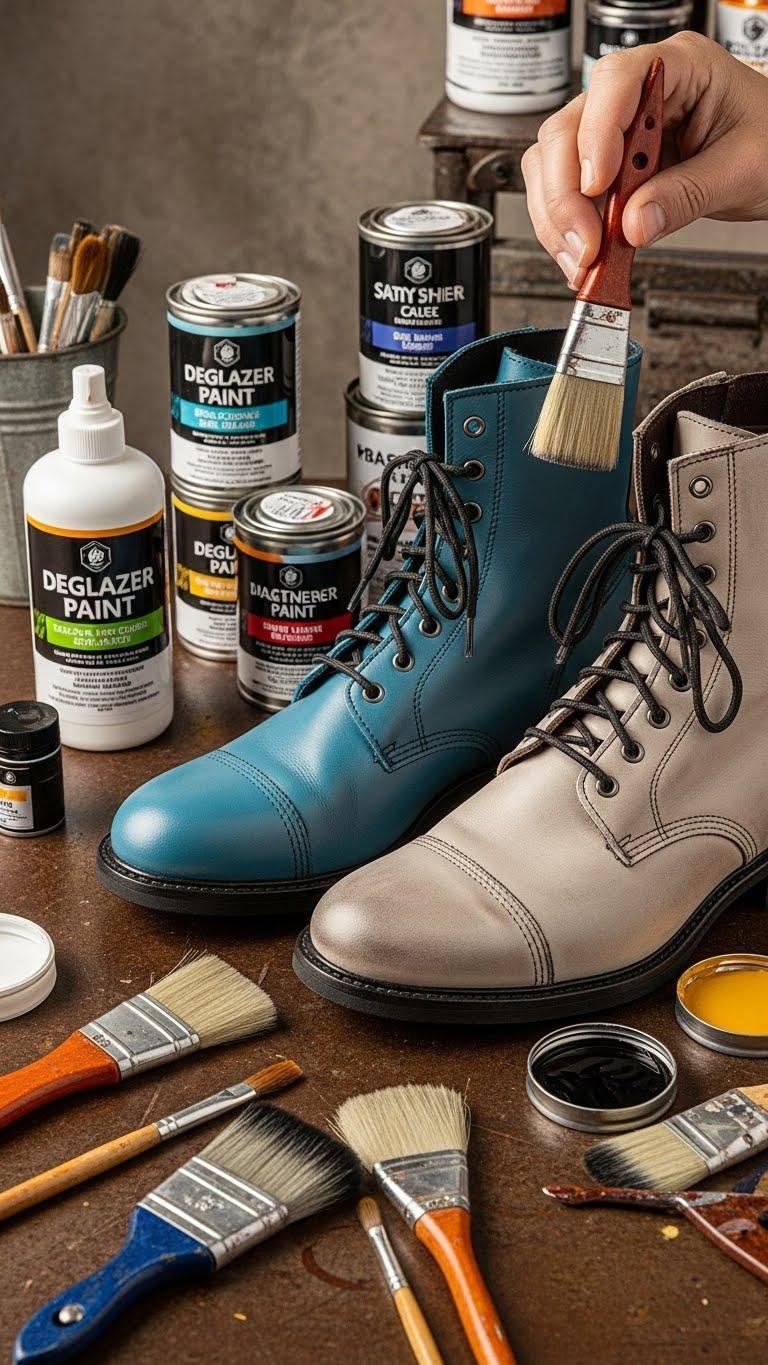
If you want a bold new look, painting leather boots gives you a dramatic color change without buying a new pair.
Choose flexible leather paint, prep with deglazer, and apply thin coats for even coverage. Embrace vintage distressing for lived-in vibe or add metallic accents for edge. Seal with matte or satin finisher. You’ll free your style without breaking the bank.
Use Leather Paint to Go From Dark to Nude Shades
When you want to turn dark leather boots into chic nude tones, expect careful prep and patience rather than a quick coat; successful lightening hinges on proper deglazing, thin layered paint, and color-building techniques to avoid patchiness or an artificial, chalky finish. You’ll sand, deglaze, use primer, and apply thin coats while using shade matching tips and undertone testing methods to guarantee natural, wearable results.
Mix Custom Paints to Match Skin Tones or Styles

How do you get a truly natural nude that doesn’t read flat or fake? You’ll mix skin tone pigments, testing small batches against patterned swatches to capture depth.
Start with warm, cool, and neutral bases, add tiny translucent layers, and compare in daylight. Trust subtle contrasts over one-note tints. Aim for wearable freedom—boots that feel like an extension of you, not a mask.
Paint Zippers and Hardware With Paint Pens
Tidy up zippers and hardware with oil-based paint pens to give boots a cohesive, high-end look without replacing parts.
You’ll modernize tarnished pulls with metallic accents or mute shine for subtlety.
Use steady strokes for clean, crisp lines and contrast outlines to define edges.
It’s a quick, low-cost upgrade that keeps your boots functional while matching current minimalist and rebel-chic trends.
Choose Flexible Acrylic or Leather-Specific Paints
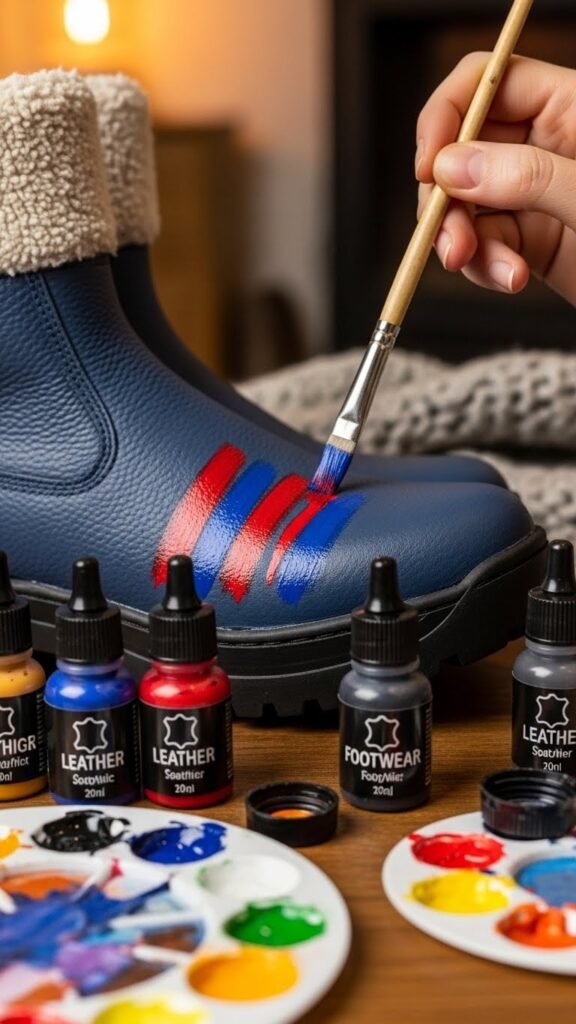
Because winter boots flex with every step, pick paints formulated to move with the material so your design won’t crack or peel; flexible acrylics and leather-specific paints are engineered with binders that tolerate bending, abrasion, and moisture better than standard craft paints.
Choose flexible acrylics or leather specifics labeled for footwear, test on a hidden seam, thin in layers, and seal for longevity.
Cut Tall Boots Down to Create Trendy Short Boots
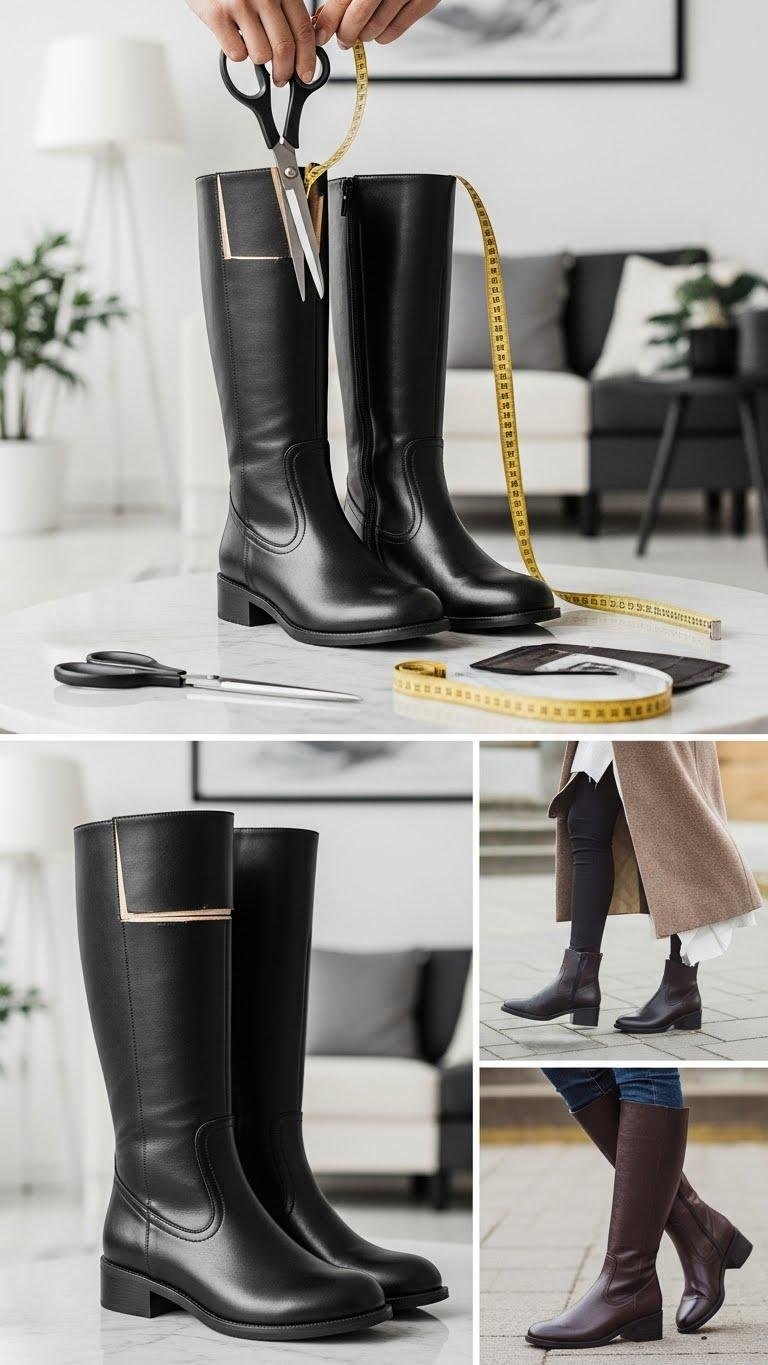
Trim tall boots to modernize them into ankle- or mid-calf silhouettes that are easier to style and more practical for daily wear.
You can cut confidently, plan shaft reshaping for balanced proportions, and consider simple heel conversion if lower, chunkier heels suit your life.
Measure twice, mark once, and use sharp tools so the result feels freeing, chic, and genuinely wearable.
Sew or Embroider Edges After Cutting to Prevent Fray
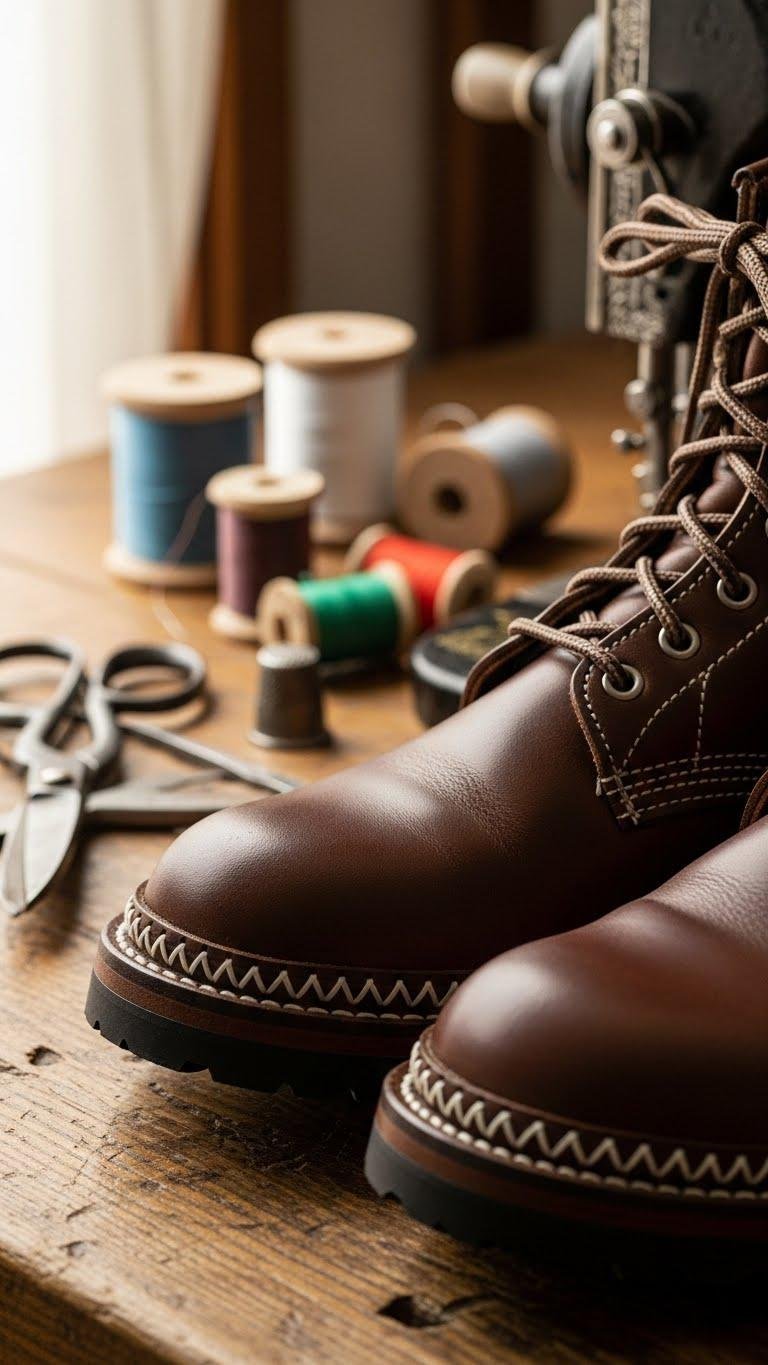
Sewing or embroidering the raw edges after you cut your boots keeps them looking intentional, not DIY-shoddy.
You’ll want neat edge binding for clean lines and reliable fray prevention; pick matching thread or contrast for a statement. Use a tight zigzag or hand blanket stitch, clamp edges, and go slow.
It’s a simple, wearable upgrade that feels free and polished.
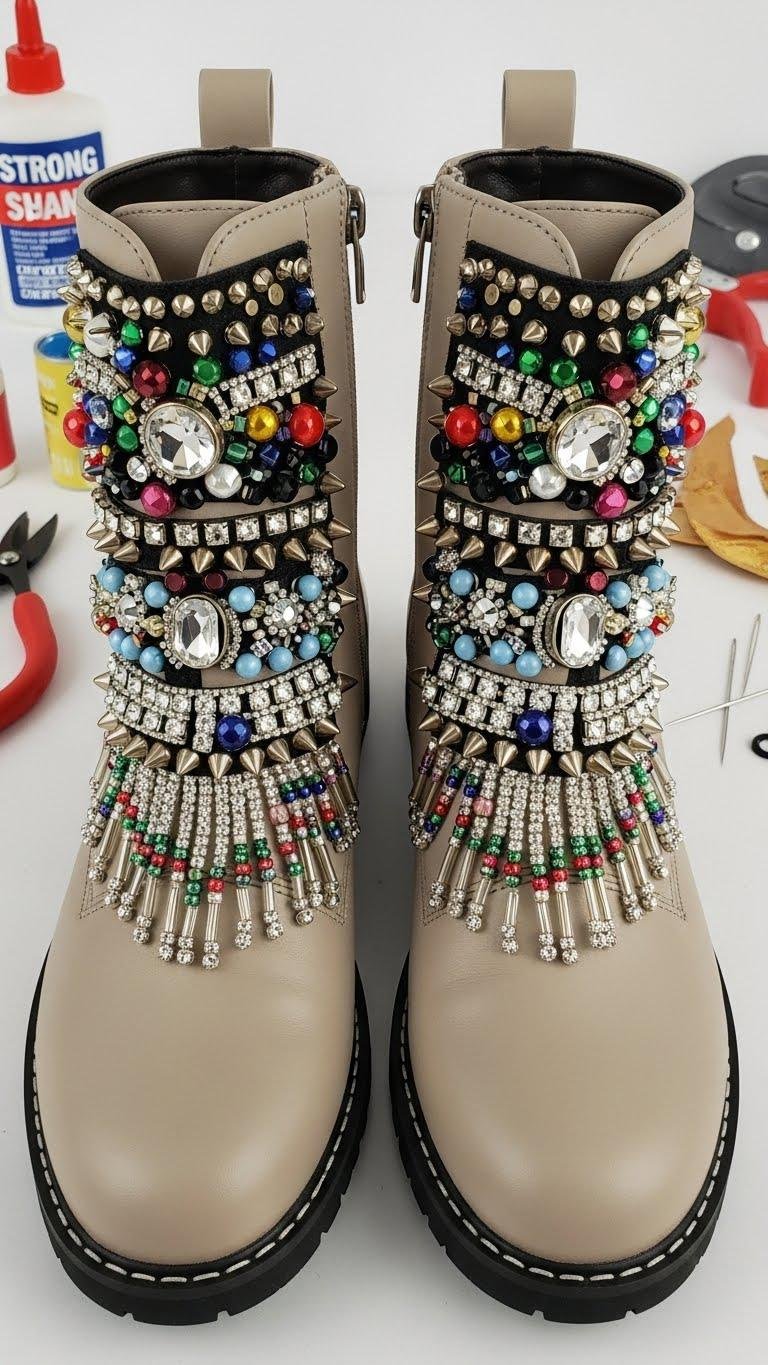
Add Beads, Studs, or Rhinestones for Sparkle
Paragraphs
Apply Glitter to Heels and Accented Panels
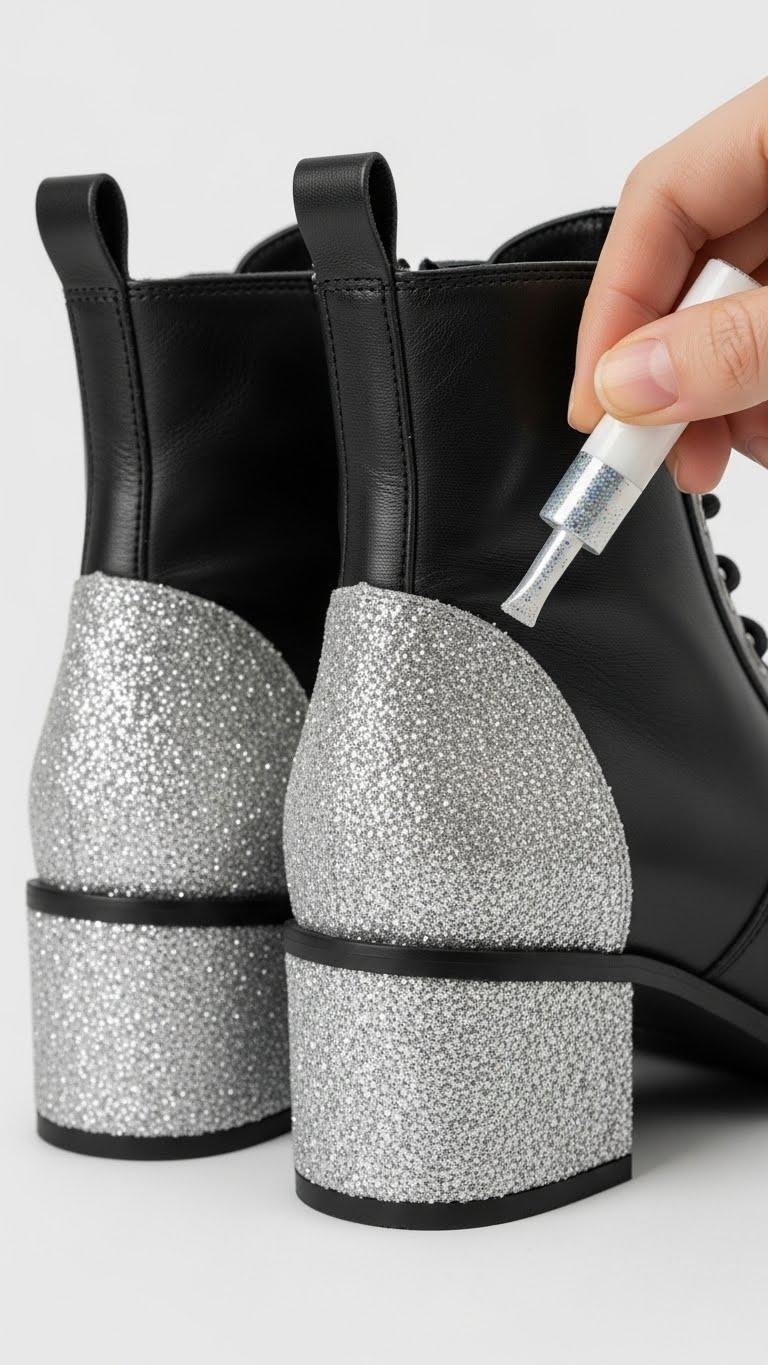
Give your boots a chic lift by concentrating glitter on the heel and select panels rather than coating the whole shoe—it’s a smarter, trend-savvy move that keeps the look modern and wearable.
Use heel stencils for crisp edges, quality glitter adhesives to prevent fallout, and mask surrounding leather. You’ll preserve versatility, express boldness, and avoid an overdone, dated finish.
Create Beaded Western-Inspired Designs
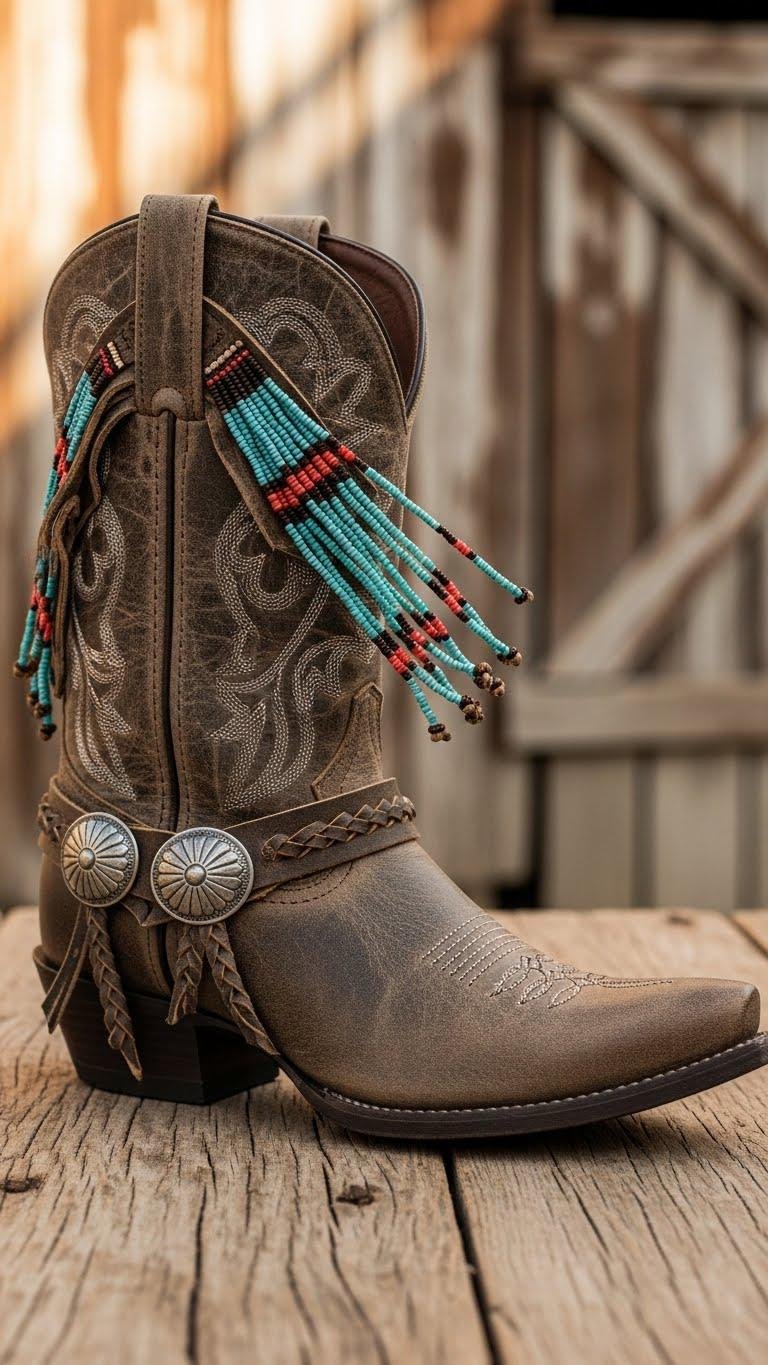
Try a beaded western-inspired design to add texture and heritage flair without overwhelming the boot’s silhouette. Opt for slim beaded fringe along the shaft and subtle metal conchos near the ankle to nod to tradition without bulk. You’ll balance rugged and refined by choosing toned-down colors and measured placement, keeping movement easy and the look freedom-forward and wear-anywhere ready.
Secure Embellishments With Glue and Stitching
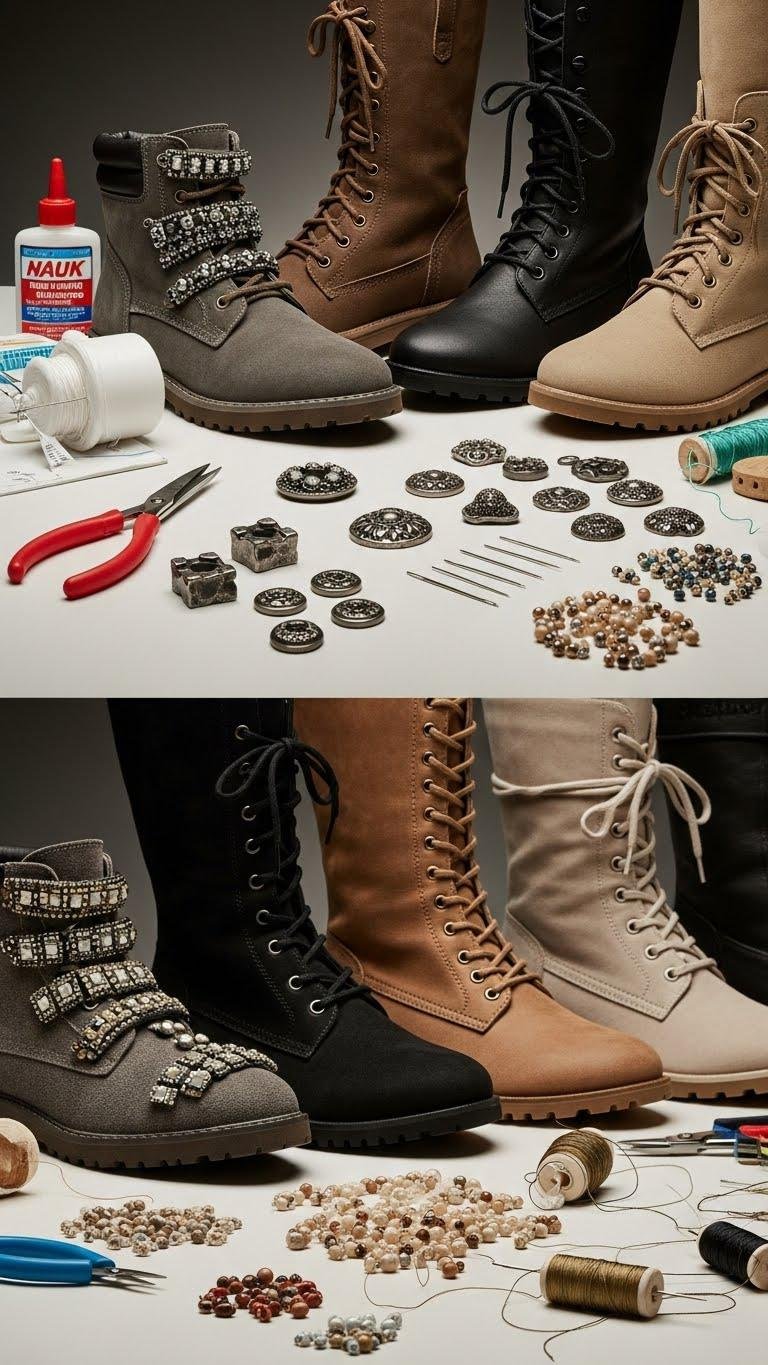
Start by evaluating the boot material and embellishment weight so you can choose the right combination of glue and stitches; leather and heavy metal pieces need different adhesives and reinforcement than suede and lightweight beads. You’ll pair a strong adhesive for immediate hold with threaded reinforcement at stress points. Trim excess, test flexibility, and secure edges so your boots stay bold, wearable, and free.
Combine Glitter, Flowers, and Fabric for Statement Boots
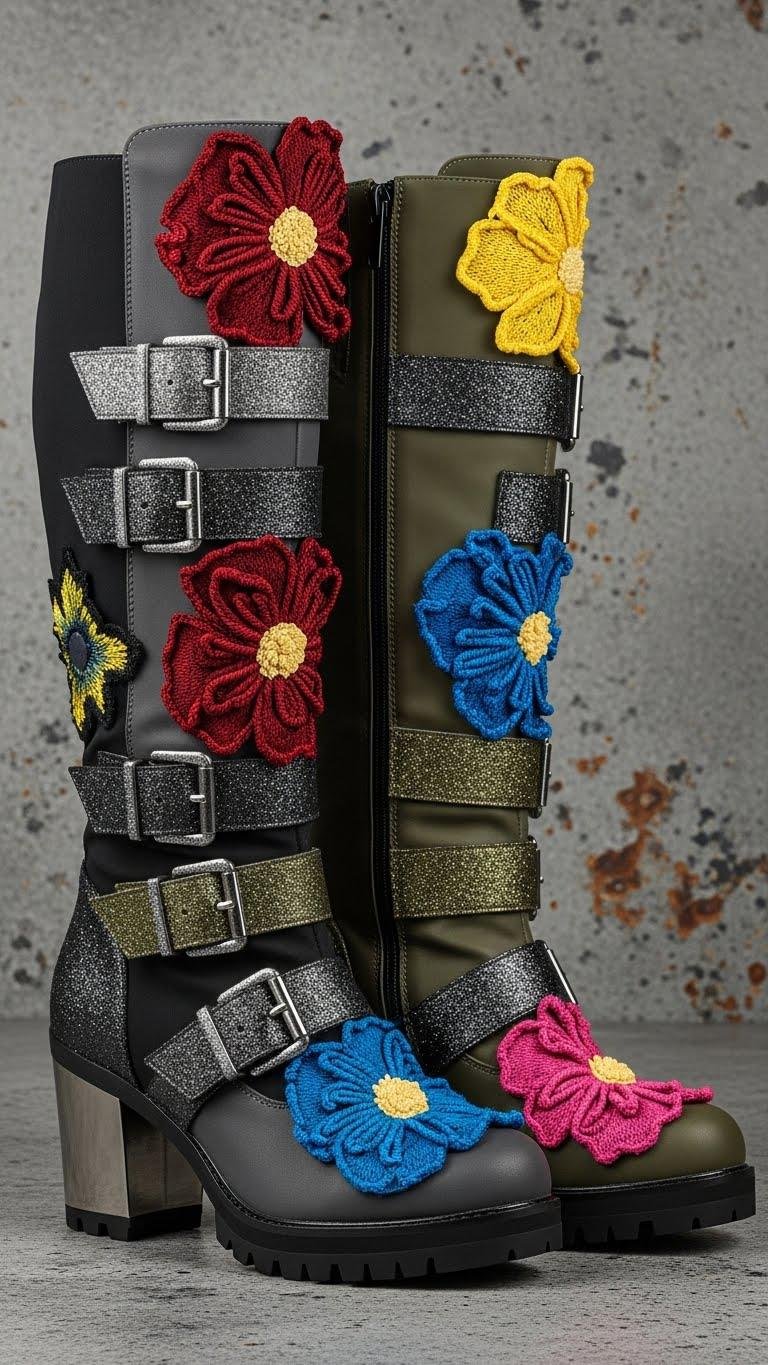
Once you’ve locked down which adhesives and stitches work with your boot materials and heavy bits, shift focus to layering sparkle, blooms, and fabric for a statement that holds up on the street. Pair glittered buckles with targeted floral appliqués, anchoring each piece where wear concentrates. Balance shimmer with matte panels, trim excess, and test mobility so your boots feel free, bold, and durable.
Attach Faux Fur Trims or Knitted Cuffs for Warmth
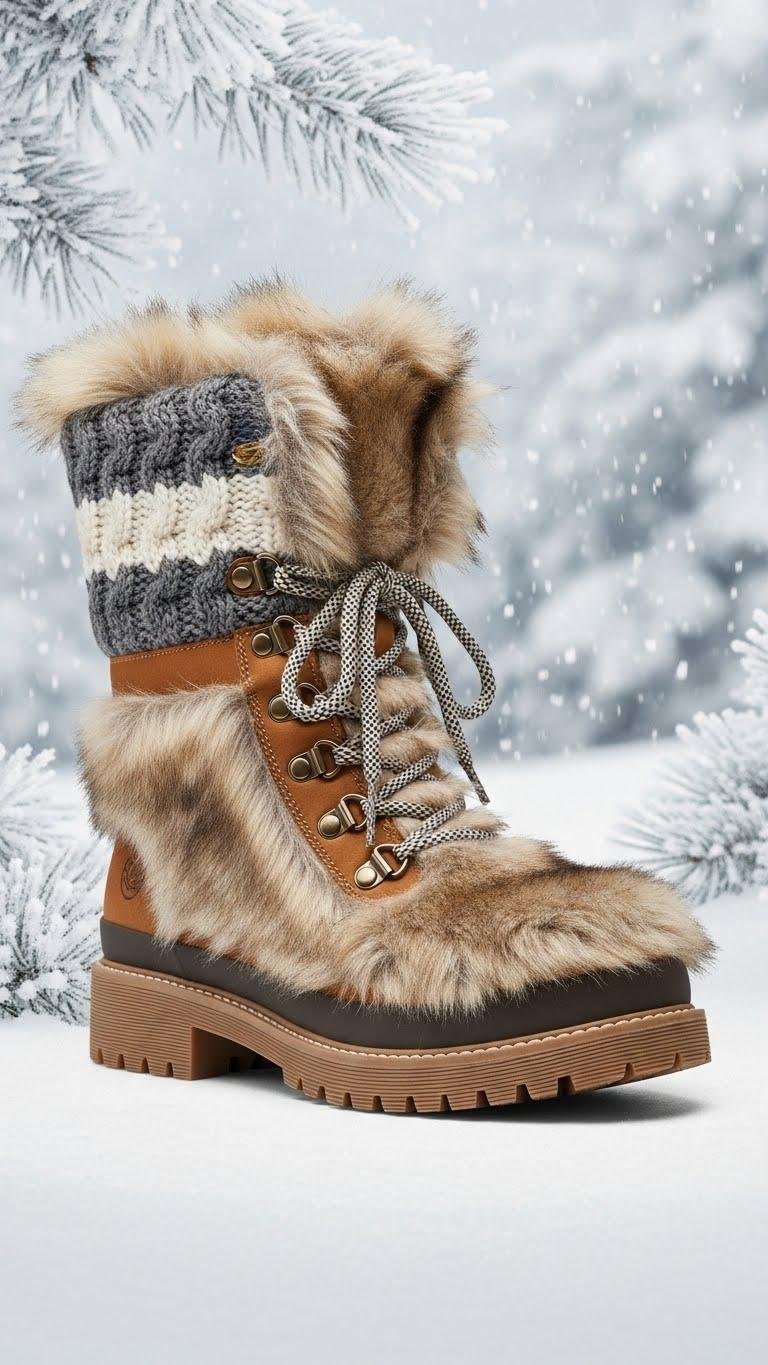
If you want to add instant warmth and a fashion-forward edge, attach faux fur trims or knit cuffs at the top edge, around the shaft, or peeking from the tongue and collar—areas that both show and insulate.
You’ll choose detachable faux fur collars or permanent stitch-ins. Favor simple snaps or fabric glue for quick changeability.
Embrace knitted cuff layering for a liberated, cozy look.
Use Waterproof Spray After Fabric Modifications
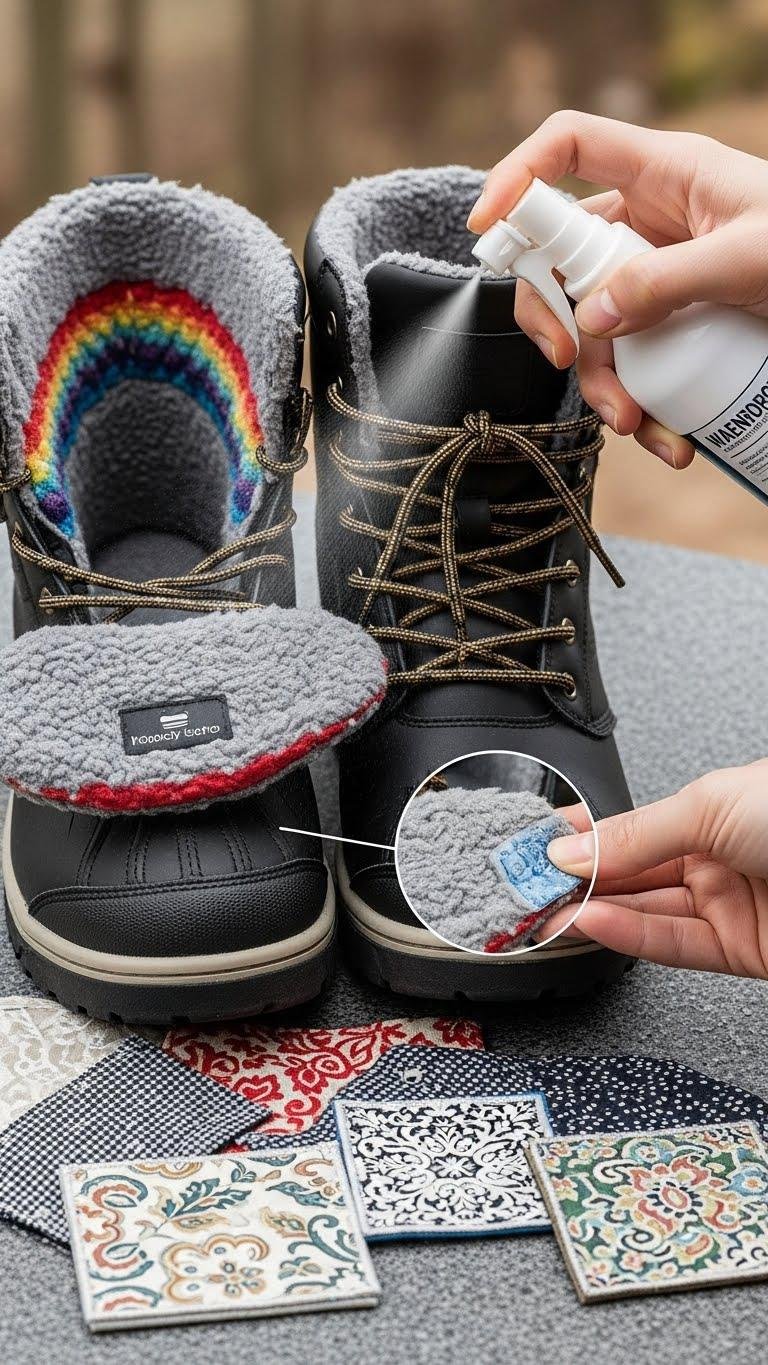
Swapping liners gives your boots renewed fit and warmth, but fabric alterations — stitching in patches, trimming collars, or adding decorative panels — can expose fibers that soak up moisture. You’ll want a reliable fabric protector and careful seam sealing after edits. Spray evenly, dry fully, and test a hidden area. This keeps your makeover weatherproof and lets you roam without worry.
Fix or Replace Zippers to Improve Functionality

Start by testing each zipper—run it up and down to spot snags, missing teeth, or a slider that’s lost bite—because a smooth zipper is as essential as solid soles for winter boots.
If sticky, try zipper lubrication; a little graphite or silicone frees movement.
For irreparable sliders, choose slider replacement kits or visit a cobbler.
You’ll keep freedom of movement and extend boot life.
Re-lace or Swap Laces for Instant Refresh
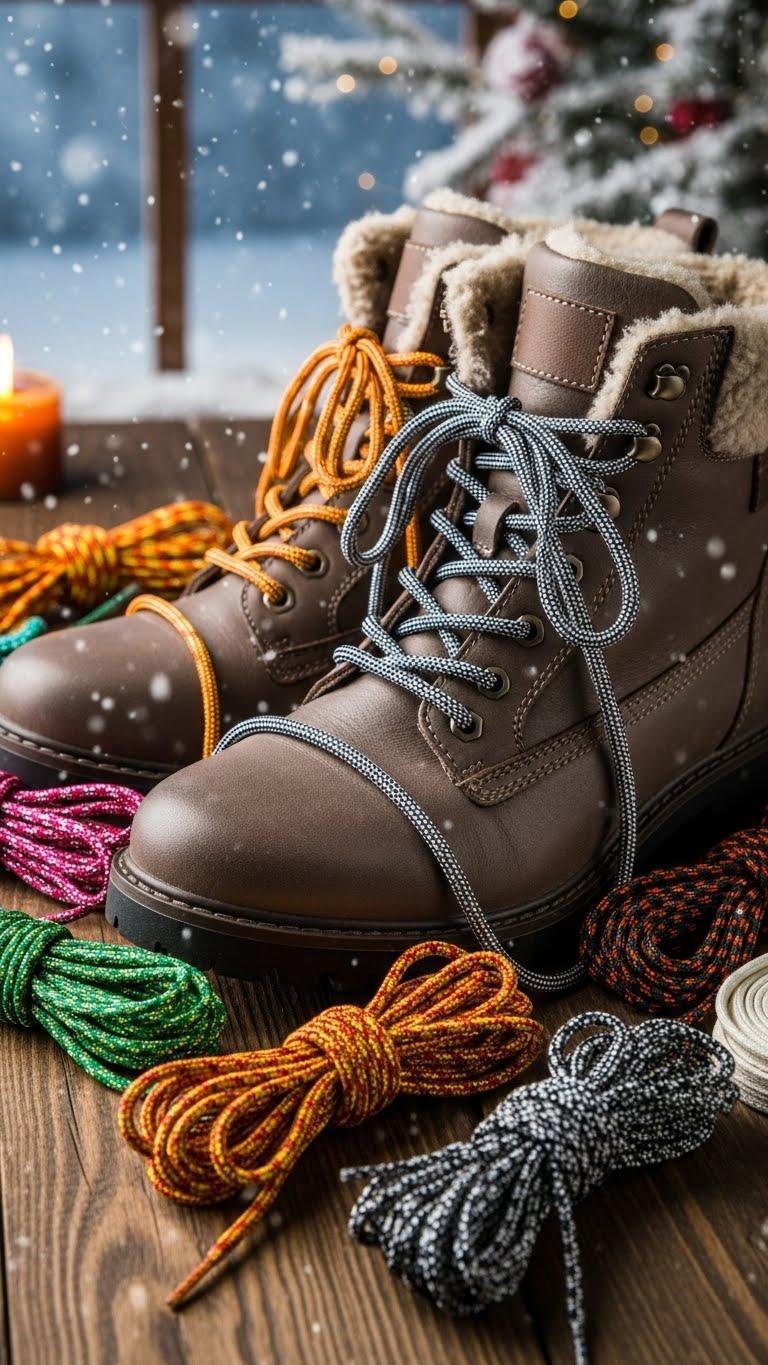
Give your boots a quick style and fit upgrade by re-lacing or swapping the laces—it’s an immediate, low-cost refresh that also improves comfort and support. Choose color coded laces to express mood or simplify matching, or pick reflective laces for night visibility.
Re-lacing changes fit and silhouette; try different patterns and tensions. You’ll feel freer, more confident, and ready for winter.
Create Removable Boot Charms and Shoellery
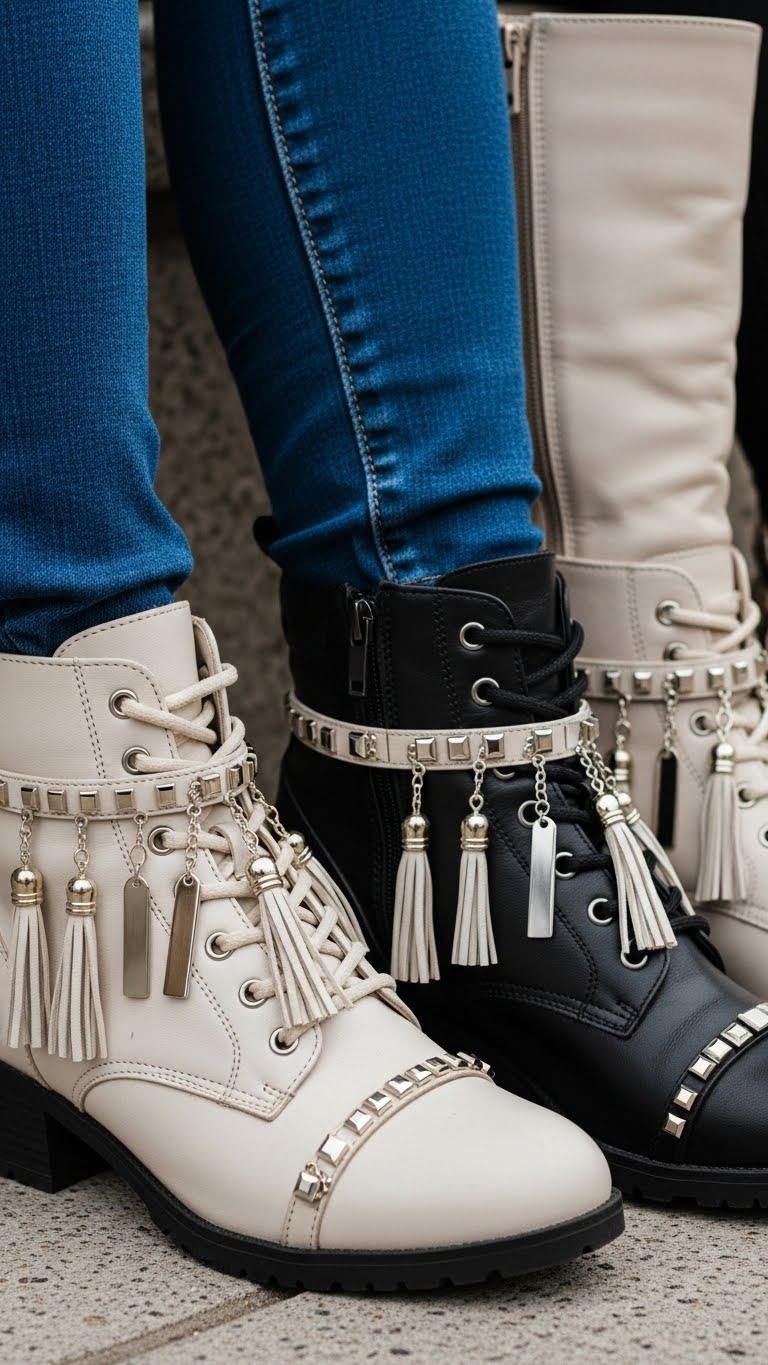
If swapping laces freshens up your boots, adding removable charms and “shoellery” finishes the look with playful precision. You’ll choose light beaded tassels or sleek metal tags that clip on without damage.
Prefer magnetic charms for instant swaps; test hold and finish. Keep proportions balanced, avoid clutter, and let each piece express mobility and ease so your boots stay versatile and bold.
Use Removable Straps or Boot Chains for Versatility
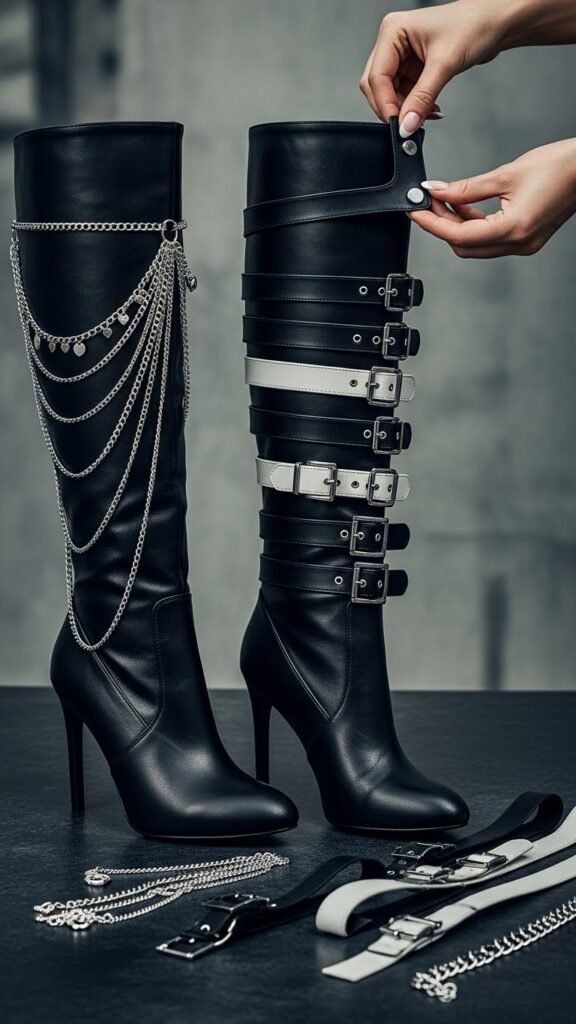
Swap out a plain silhouette for instant attitude by adding removable straps or boot chains—you’ll get drama without commitment.
Choose lightweight chains, faux-leather straps with interchangeable buckles, or pieces with magnetic closures for easy on-off.
You’ll switch looks fast: rugged daytime, sleek night.
Prioritize secure clips and balanced weight so freedom to roam stays stylish and functional.
Attach Decorative Clips or Buttons to Zipper Pulls
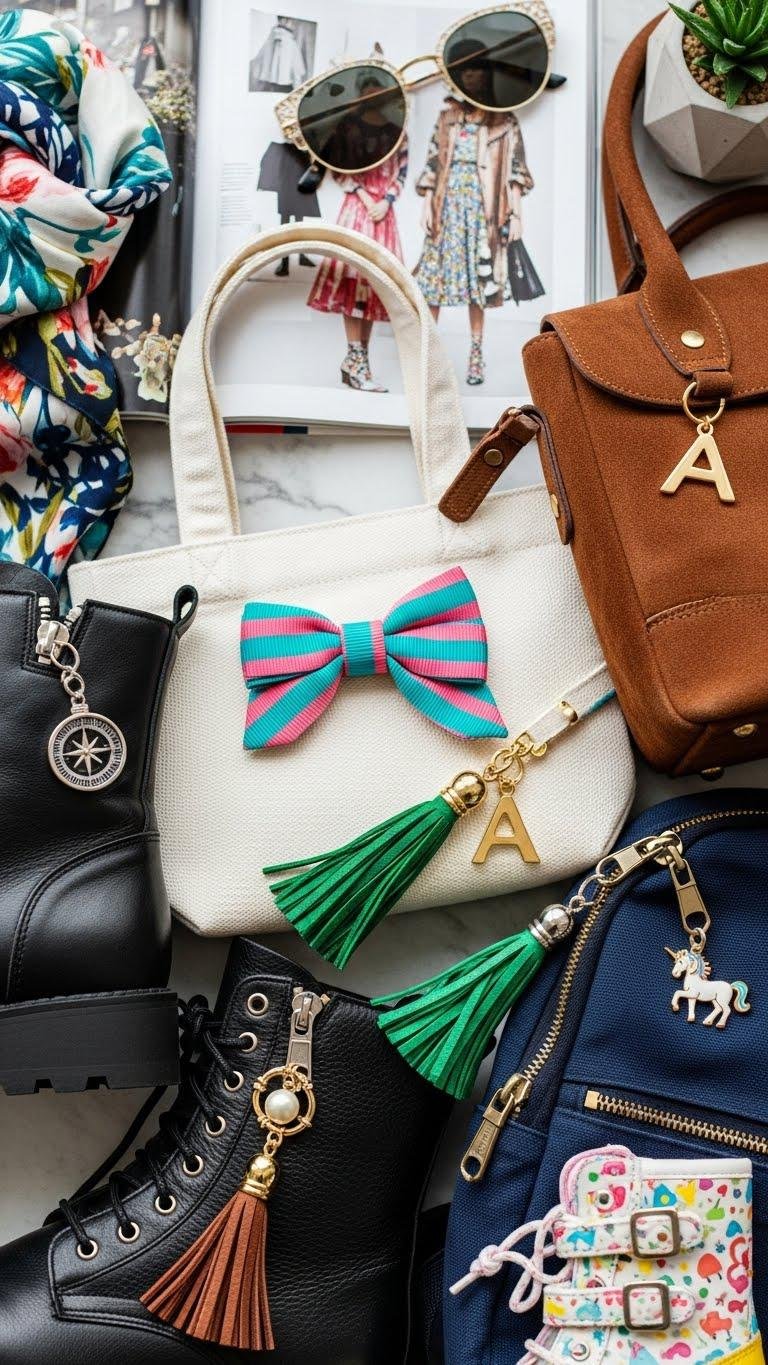
Liven up tired zipper pulls by clipping on decorative charms or buttons—you’ll get a small, high-impact upgrade that reads custom without a trip to the cobbler.
Pick sturdy metal tassels for edge or playful zipper bows for softness, secure with split rings, and swap seasonally.
You’ll refresh boots fast, keep options reversible, and avoid permanent changes while staying stylish and independent.
Use Paint Pens for Fine Details and Small Patterns
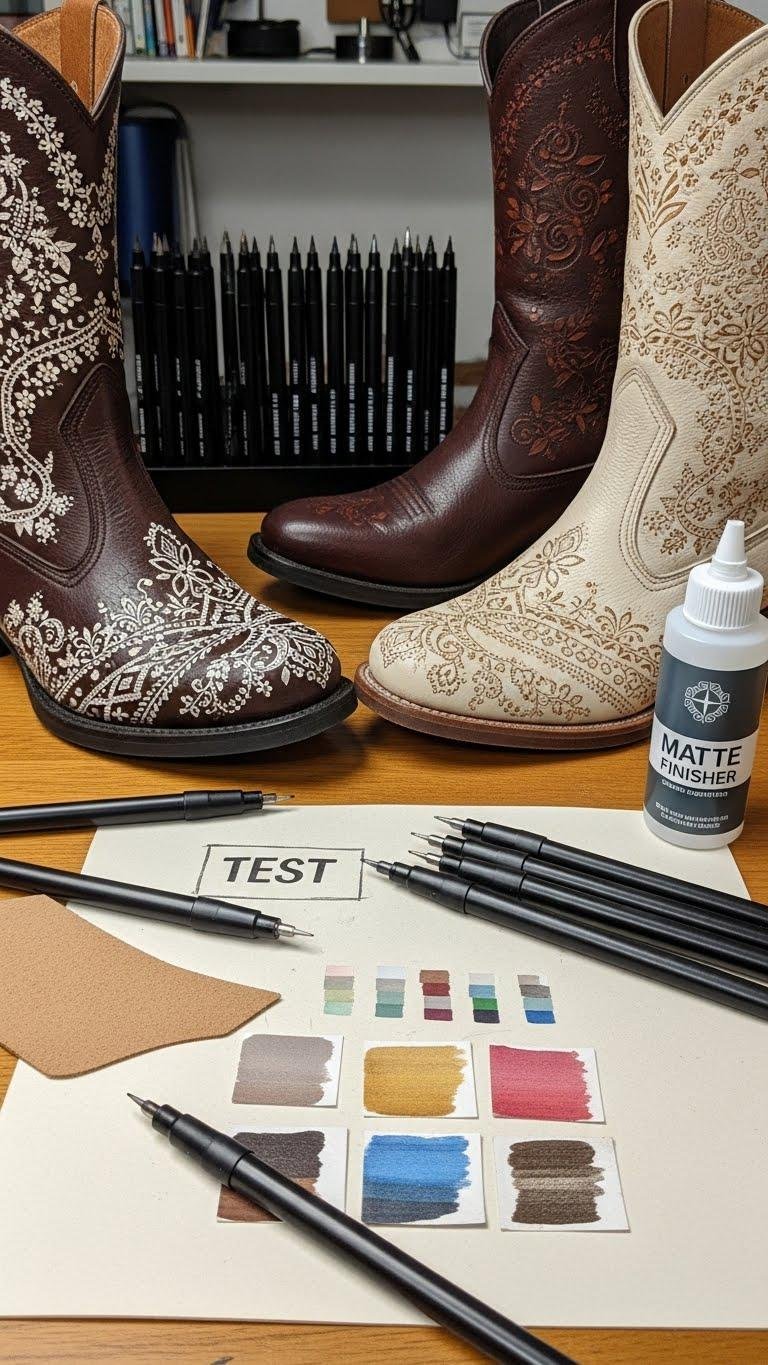
Reach for paint pens when you want crisp, controlled accents—thin tips let you draw delicate stitches, tiny florals, or geometric dots that read intentional rather than DIY. You’ll appreciate how paint pens enable fine lacework effects and micro stippling for texture. Test colors on scrap leather, work in layers, seal with matte finisher, and keep designs simple so your boots feel liberated, not overworked.
Use Stencils for Neat Logos, Letters, and Shapes

If you want crisp logos, letters, or repeatable shapes without freehand wobble, use stencils— they give clean edges and consistent spacing every time. You’ll plan stencil placement, tape edges, and test logo scaling on scrap.
Choose bold shapes, quick-dry paint, and thin layers to avoid bleed. Peel gently, touch up tiny flaws, and enjoy a modern, liberated boot look that reads deliberate, not DIY.
Add DIY Appliqués or Fabric Patches to Cover Wear
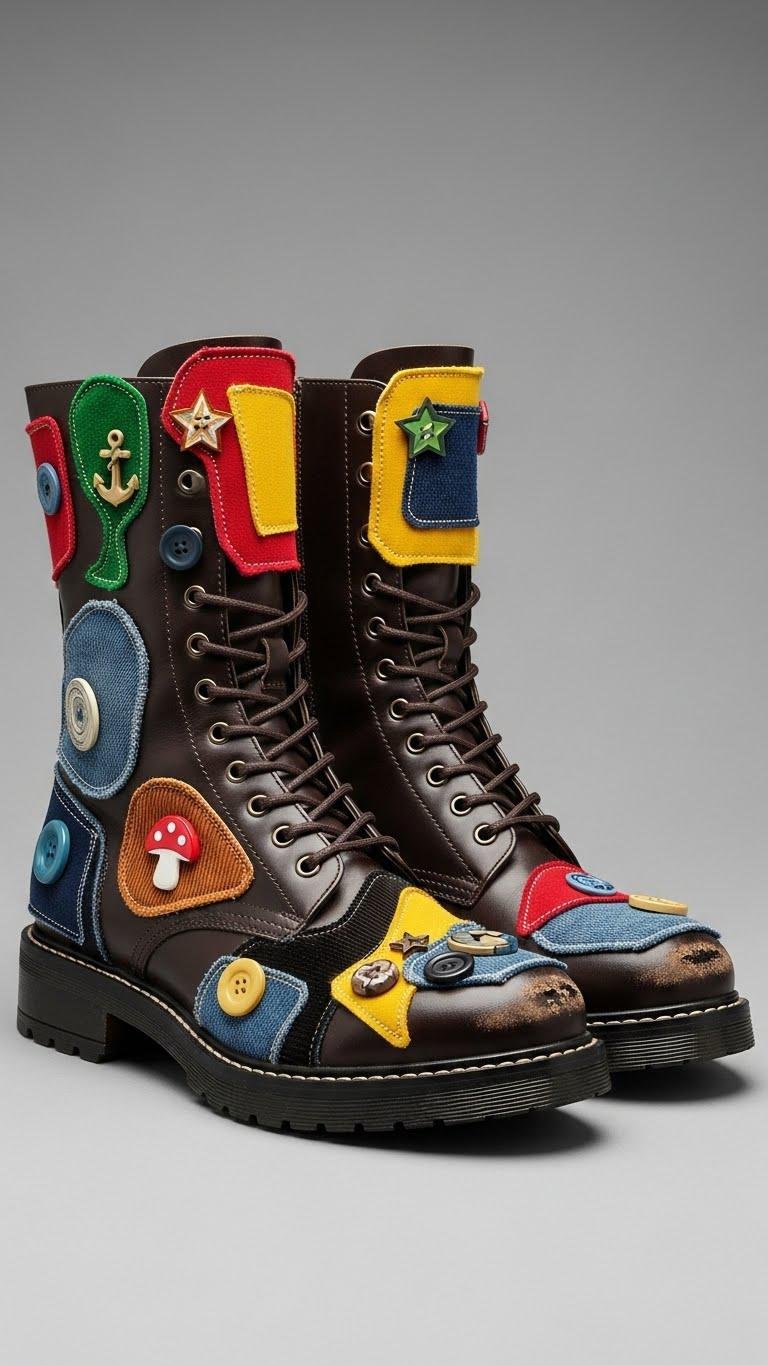
Patch up scuffs and holes with DIY appliqués or fabric patches to give tired boots a deliberate, on-trend fix that reads stylish rather than slapdash. You’ll choose bold shapes, plan patch placement for balance, and sew or glue edges cleanly. Mix textures, add novelty buttons sparingly, and keep designs asymmetric for freedom-forward looks that disguise damage while feeling intentional and wearable.
Finish With Wax or Waterproofing to Protect Changes
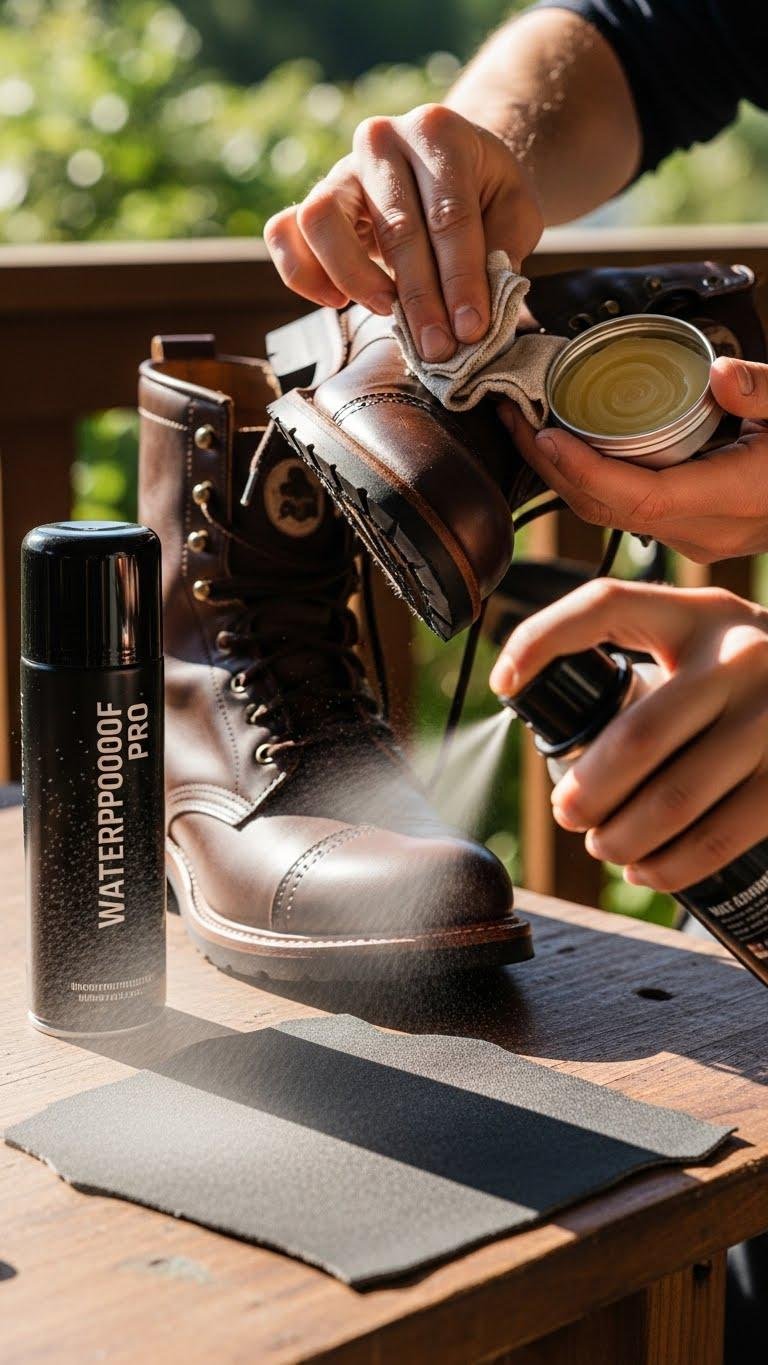
After you’ve stitched or glued your appliqués and smoothed edges, seal the look with wax or a waterproofing spray so the repairs stay intentional, not temporary.
You’ll wax buffing in circular motions to nourish leather and hide seams; let layers dry between passes.
Waterproofing boosts longevity on fabric panels—spray evenly, ventilate, and test a hidden spot to keep your boots functional and free.