
You’ll turn ordinary panes into glowing winter scenes with 22 easy DIY window silhouettes that brighten streets and spread cheer. Follow clear templates and simple materials — black cardstock, vellum, foam board, warm LEDs — to craft reindeer, nativity panels, giant snowflakes, angel wings, layered villages and more. Each project gives crisp backlit shapes that invite smiles from passersby, and a few clever hacks will make your display stand out — here’s how to get started.
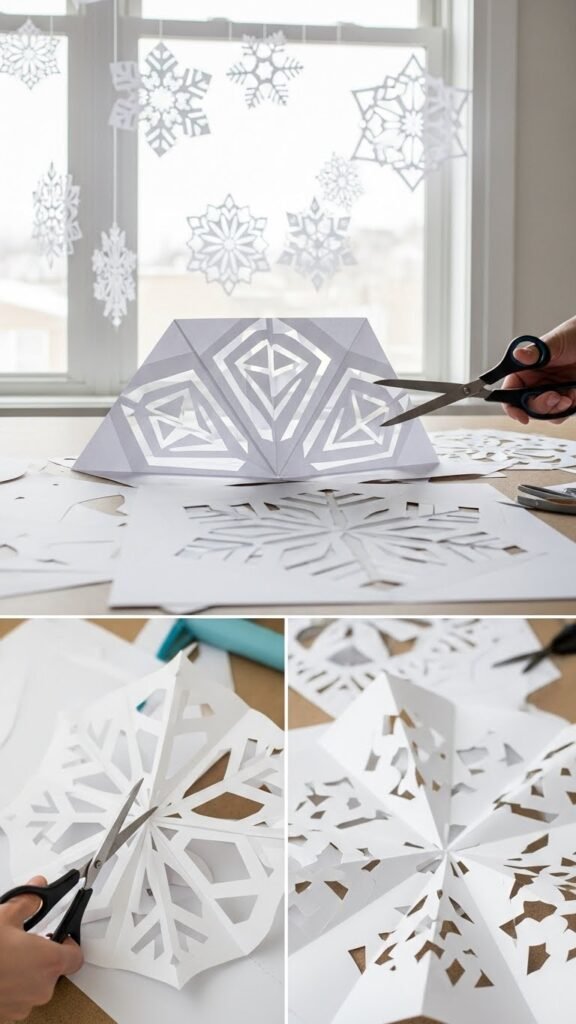
Giant Paper Snowflake Silhouettes
Cozy Gnome Window Cutouts
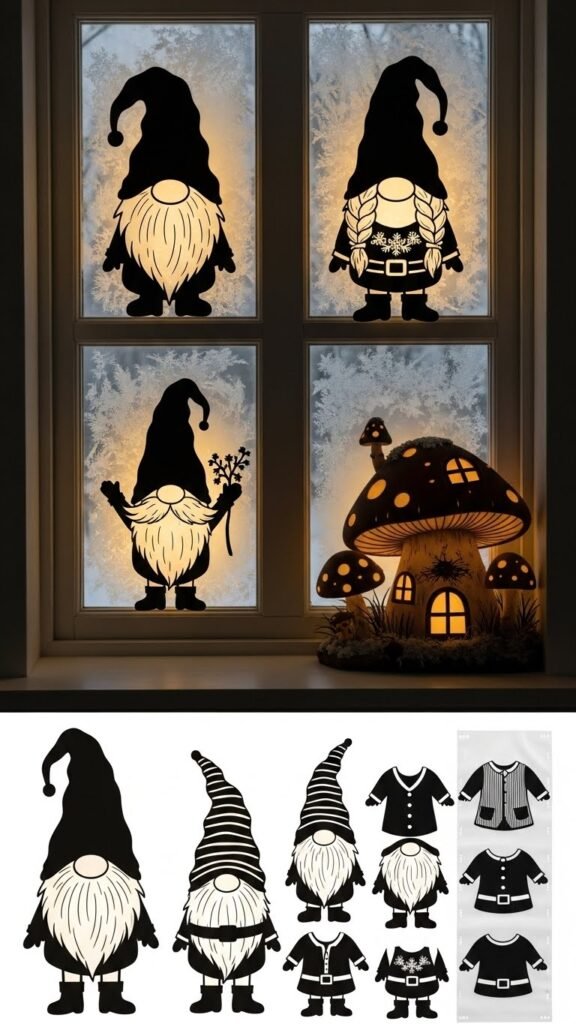
You’ve mastered delicate snowflakes, so now bring a cozy, whimsical touch with gnome window cutouts that feel warm against frosty panes. Trace simple silhouettes: tall hats, beards, tiny boots. Add a gnome wardrobe strip of detachable outfits for playful swaps. Frame a mushroom home scene beside them for depth. Cut crisp edges, backlight with soft LED strands, and let your street glow free.
Starburst Foam Board Displays
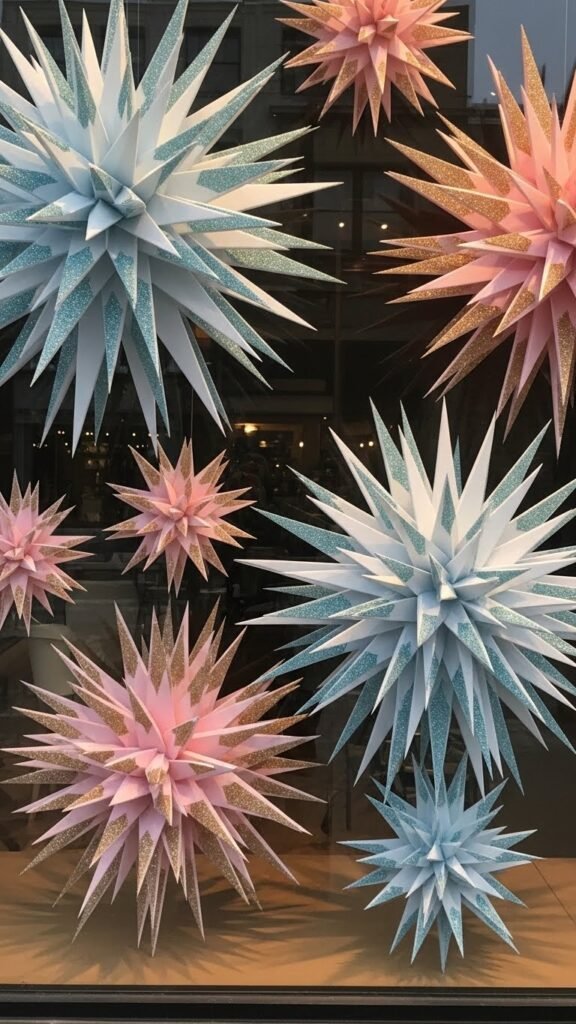
Cut crisp, radiant starbursts from foam board to give your window display an instant wow—think layered points, glittered edges, and a play of light that mimics icy sun flares on snow.
You’ll trace radial stenciling guides, use foamboard tessellation for repeating panels, and cut clean seams.
Mount pieces at varied depths, let gaps catch streetlight, and arrange freely for bold, airy impact.
Paper Origami Stars With Backlighting

If you loved the crisp geometry of foam-board starbursts, paper origami stars bring a softer, more luminous look that plays beautifully with backlighting. You’ll fold modular pieces into an origami luminaria, layering petals to diffuse LED strips.
Hang clusters against windows, angle a star baffle to tame glare, and let warm light spill free—celebratory, airy silhouettes that invite passerby wonder.
Classic Reindeer Profile Silhouettes
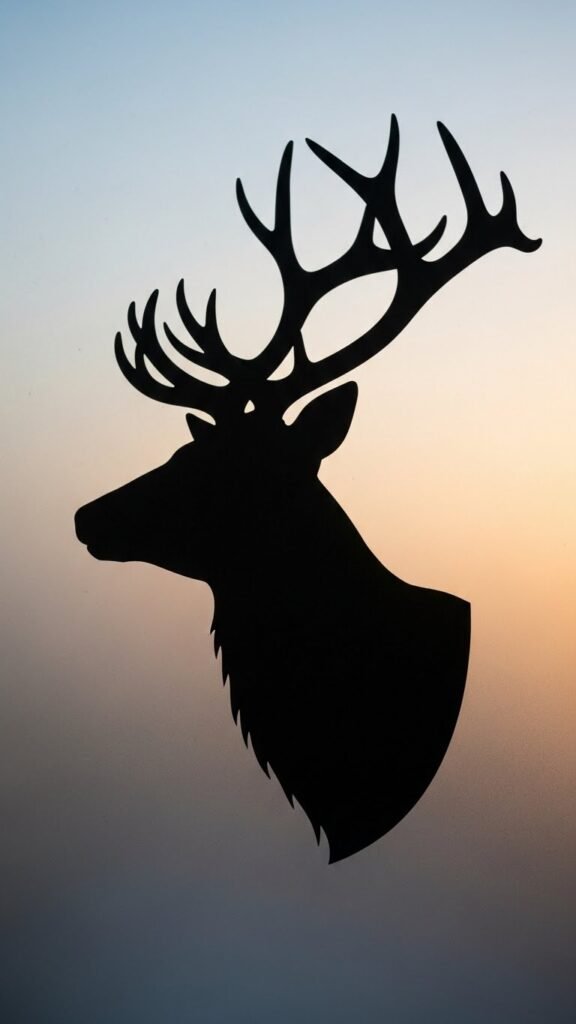
When you trace a classic reindeer profile onto matte black paper and set it against a frosted window, the silhouette reads instantly as holiday charm—streamlined antlers, a proud neck, and that gentle muzzle cut a striking shape at dusk.
You’ll use silhouette tracing for crisp edges, refine antler framing for balance, and mount simply so passerby feel liberated by bold, joyous imagery.
Festive Wreath Shape Cutouts
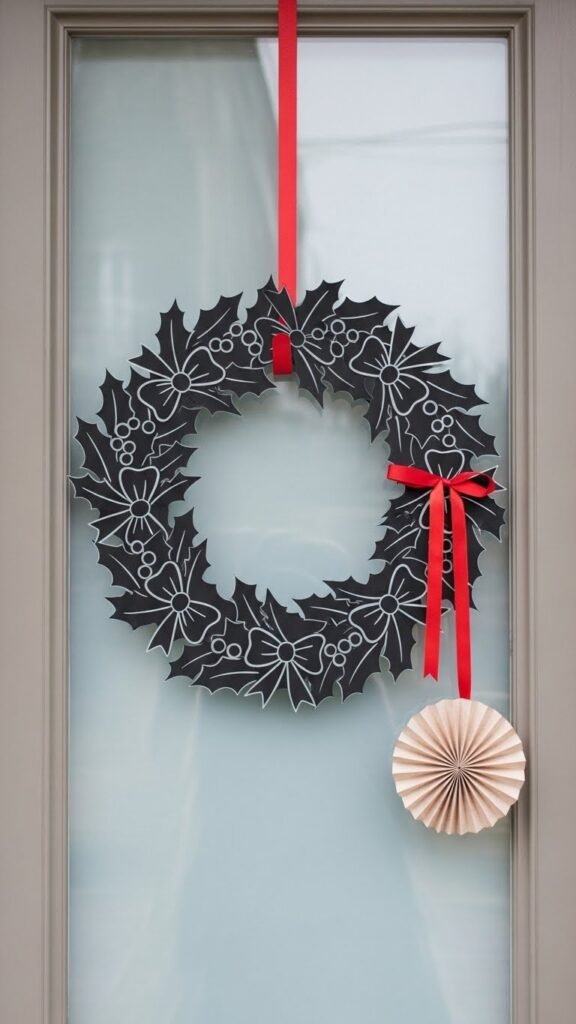
Arrange a simple wreath silhouette from matte black paper to transform your window into a seasonal focal point: trace a neat circle, add evenly spaced holly leaves or bow shapes, and trim for crisp, balanced edges so the design reads clearly against frosted glass.
You’ll accent with a bold holiday ribbon or a delicate paper rosette, position freely, and secure for striking, liberated curb appeal.
Layered Bauble Window Silhouettes
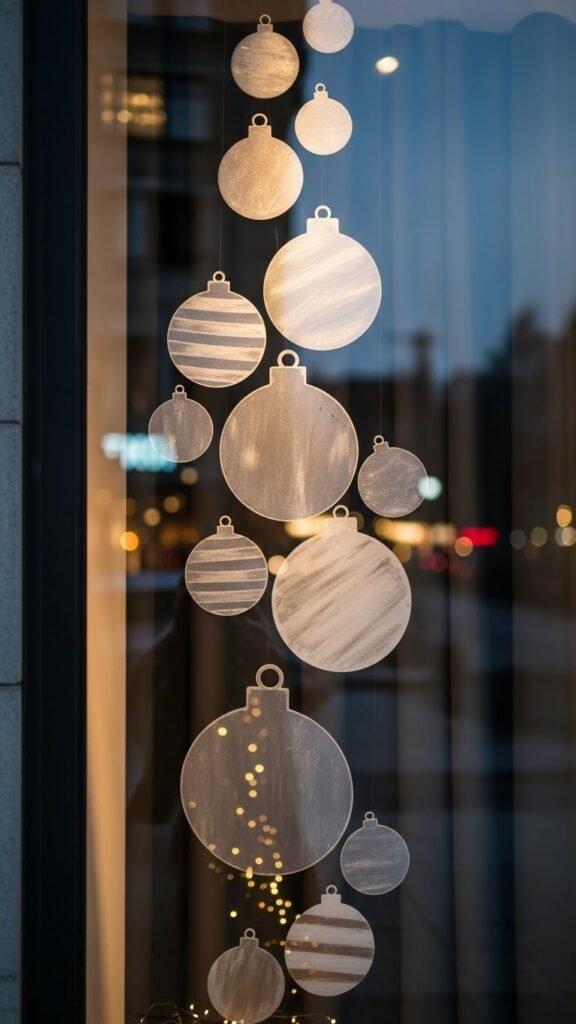
After crafting your wreath silhouette, shift attention to layered bauble window silhouettes to add depth and playful movement across the glass.
You’ll cut circles in varied sizes, paint textured baubles with metallics and matte contrasts, then arrange as staggered, stacked ornaments that seem to float. Tape them with removable adhesive, leaving gaps for light to dance. Enjoy the liberated, joyous display.
Snowy Pine Tree Panels
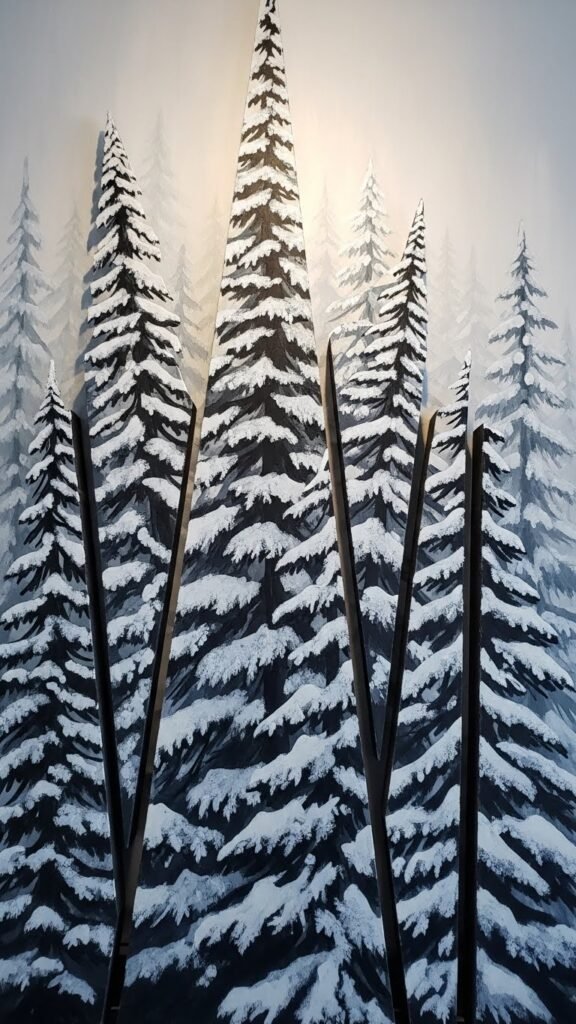
As you move from baubles to a cooler palette, cut tall triangular panels and paint layered pine silhouettes with soft, snow-dusted edges to create a forested scene on your window. You’ll mount each frosted panel slightly offset for depth, vary heights for rhythm, and backlight them to glow. Embrace bold cuts, quick brushstrokes, and the freedom to arrange your wintry grove.
Scandinavian Heart and Star Motifs
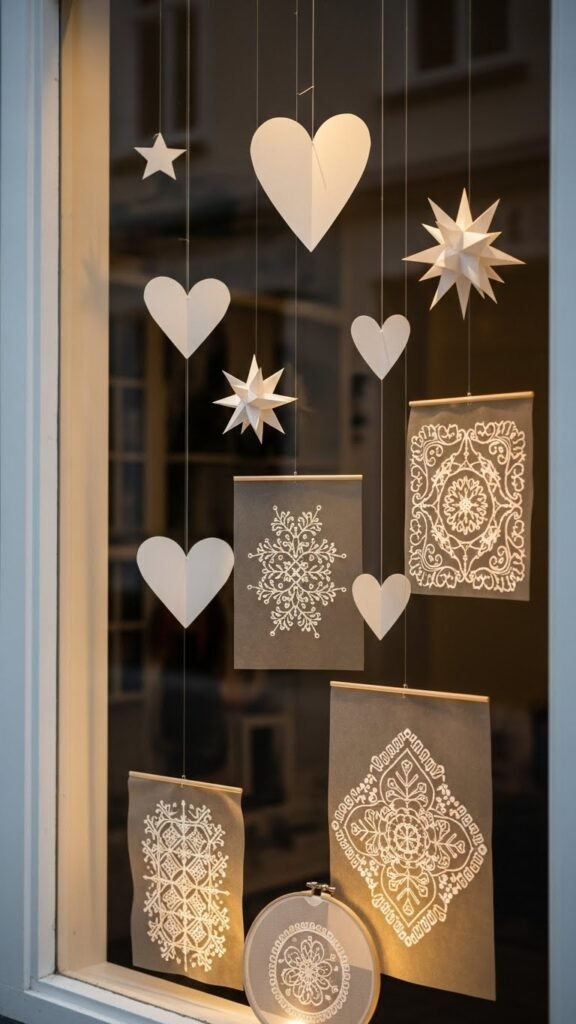
Swap the frosted pines for crisp, minimalist shapes and you’ll find the warm charm of Scandinavian heart and star motifs ready to brighten your window.
Cut paper hearts and stars using Scandinavian motifs as guides, hang asymmetrically for airy freedom, and trace minimalist embroidery patterns onto vellum for soft glow.
You’ll stitch, layer, and arrange with joyful simplicity.
Silhouetted Holiday Village Scene
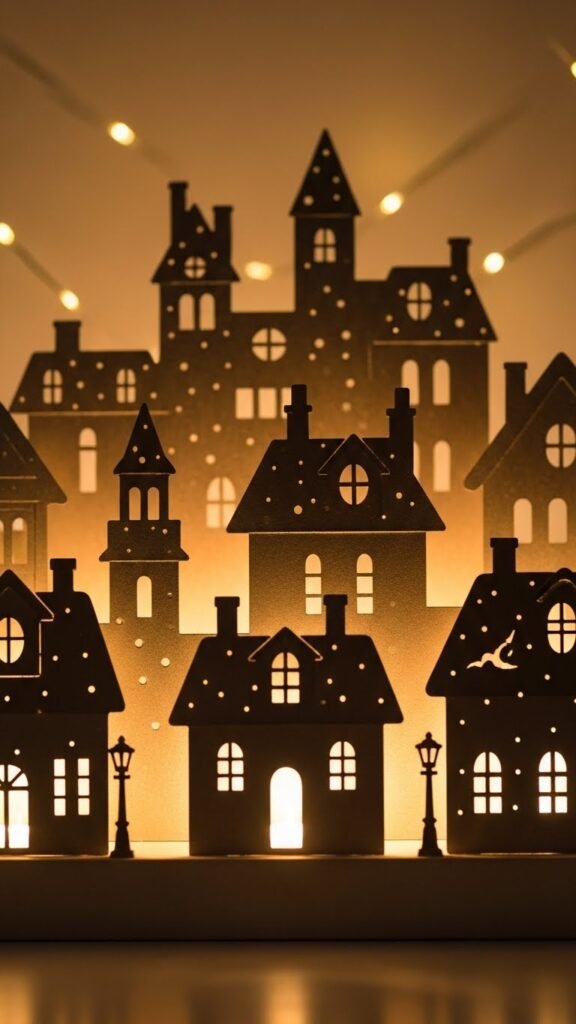
Imagine tracing a sleepy little town in silhouette across your window, rooftops and steeples cut from black paper and layered to catch the glow of indoor lights; you’ll arrange varying heights and depths to create a sense of distance, tuck in tiny paper chimneys and lamp posts for character, and leave gaps for soft light to spill through as if snow were falling.
Cut a paper village, add lantern silhouettes and snowy rooftops, glue staggered layers for depth, and tuck miniature lampposts near doorways.
You’ll step back, adjust spacing, and let freedom guide whimsical placement.
Playful Penguin and Polar Bear Cutouts
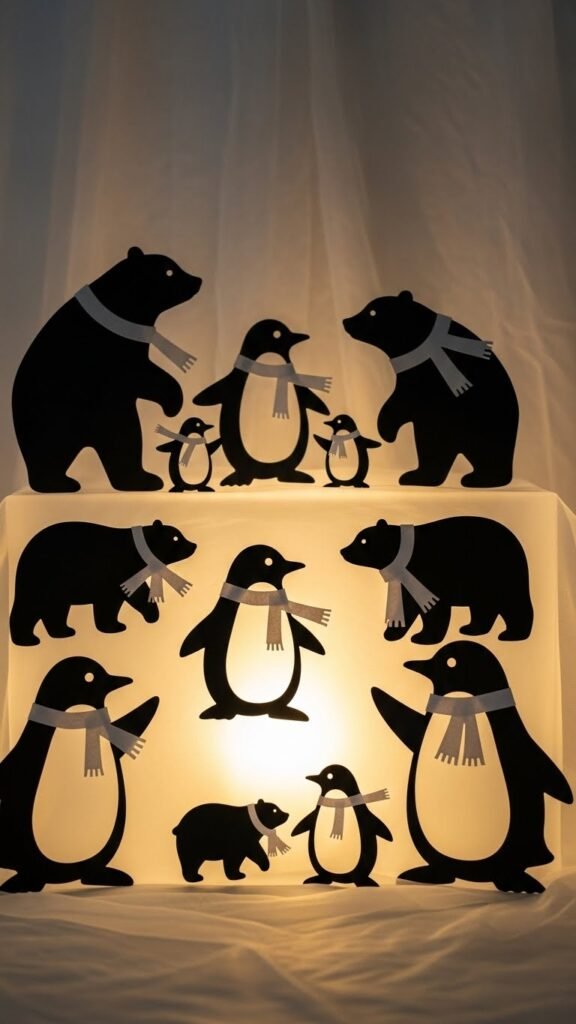
Bring cheerful Arctic charm to your window with playful penguin and polar bear cutouts you can layer and backlight for a lively silhouette display.
Cut bold shapes from black cardstock, vary sizes, and arrange on sheer fabric or frosted film. Use removable adhesive, add tiny paper scarves, and position a warm LED behind the scene. You’ll create a joyful, free-spirited winter tableau.
Candlelight Window Silhouettes With LED Flicker
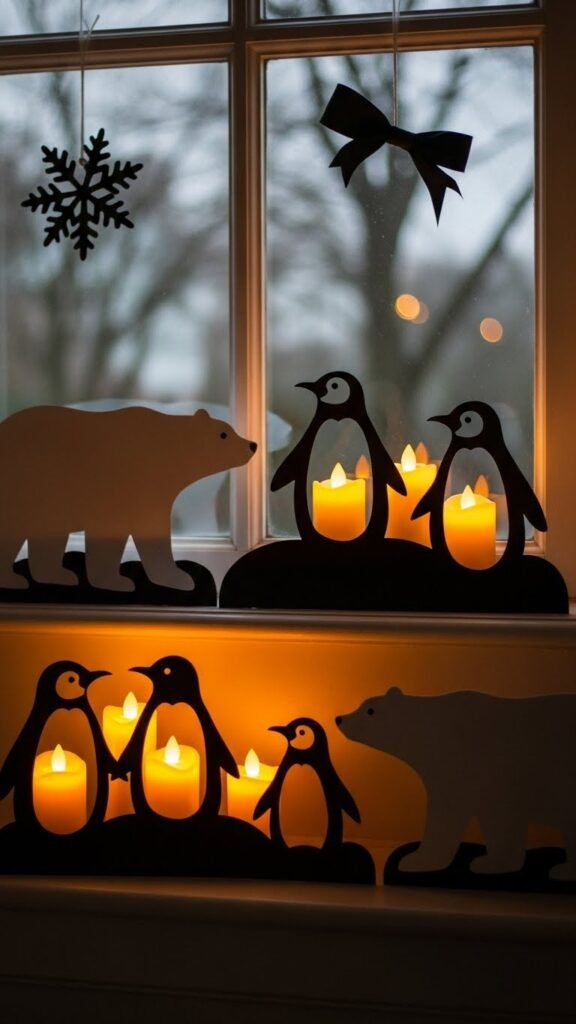
If you loved the playful penguins and polar bears, you’ll like how a row of candlelit silhouettes adds warm, flickering charm to your window scene.
You’ll cut simple flame shapes from black card, place battery LED candles behind them, and adjust spacing so the shadow flicker dances across glass.
Arrange varying heights for depth, secure with removable putty, and enjoy your liberated, cozy display.
Santa’s Sleigh and Flying Reindeer Line
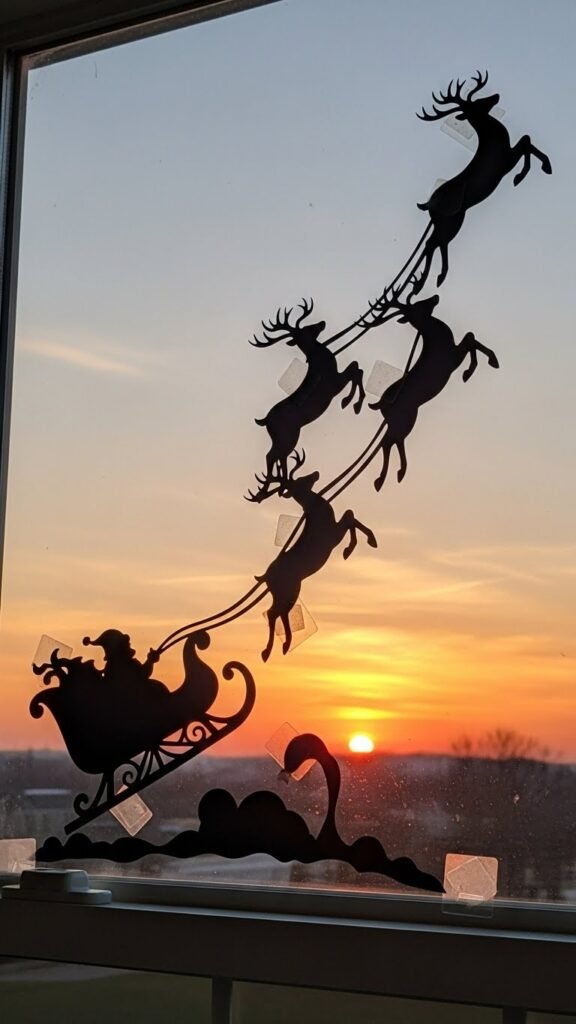
Cut a sweeping sleigh and a line of leaping reindeer from black card, then mount them across your window to create a dramatic, airborne silhouette.
You’ll map sleigh dynamics by angling the runners and tilt the sleigh slightly upward.
Arrange reindeer formation with varied leg positions for motion.
Secure pieces with removable adhesive so you can reposition and let your display roam free each season.
Delicate Paper Snowflake Cluster
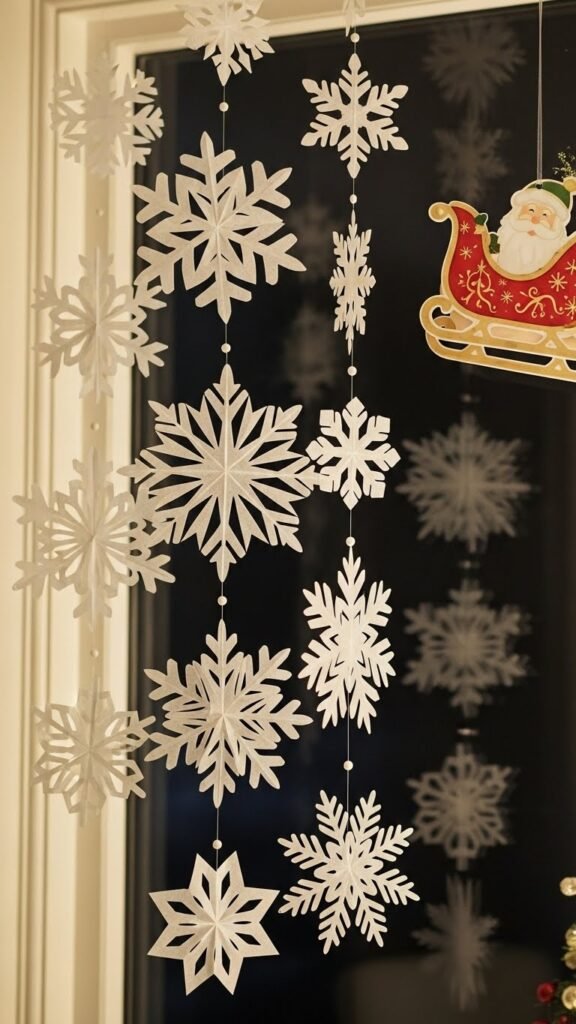
After you’ve hung Santa’s sleigh, soften the scene with a cluster of delicate paper snowflakes that seem to drift across the glass.
Cut varied sizes, use tissue layering for translucence, and employ adhesive stencils to trace crisp shapes.
Attach with removable dots or clear tape, staggering depth for movement.
You’ll create a free-spirited, wintry display that invites passerby wonder.
Winter Bird and Branch Silhouettes

Bring winter to life on your panes with delicate bird and branch silhouettes that balance charm and simplicity. You’ll cut cardinal outlines and small perches from black paper, arrange them among frosty twigs painted in metallic white, and tape them to glass for striking contrast. Step back, tweak spacing, and let soft backlighting turn your window into a liberated, festive street vignette.
Cozy Fireplace and Stocking Cutout
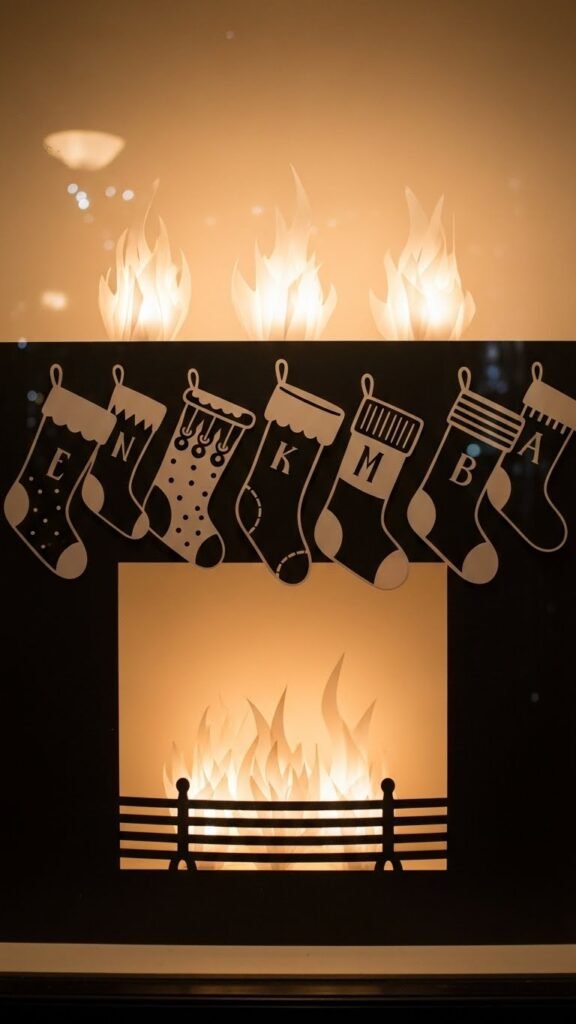
When you trace and cut a simple fireplace silhouette and a row of dangling stockings from black paper, you’ll instantly add cozy, nostalgic charm to the window.
Position flames behind translucent paper to suggest hearth textures, then vary stocking shapes for rhythm.
You’ll personalize each with small initials or patterns for stocking personalization, letting passersby feel warmth and playful independence.
Spooky-Season Raven and Cat Silhouettes
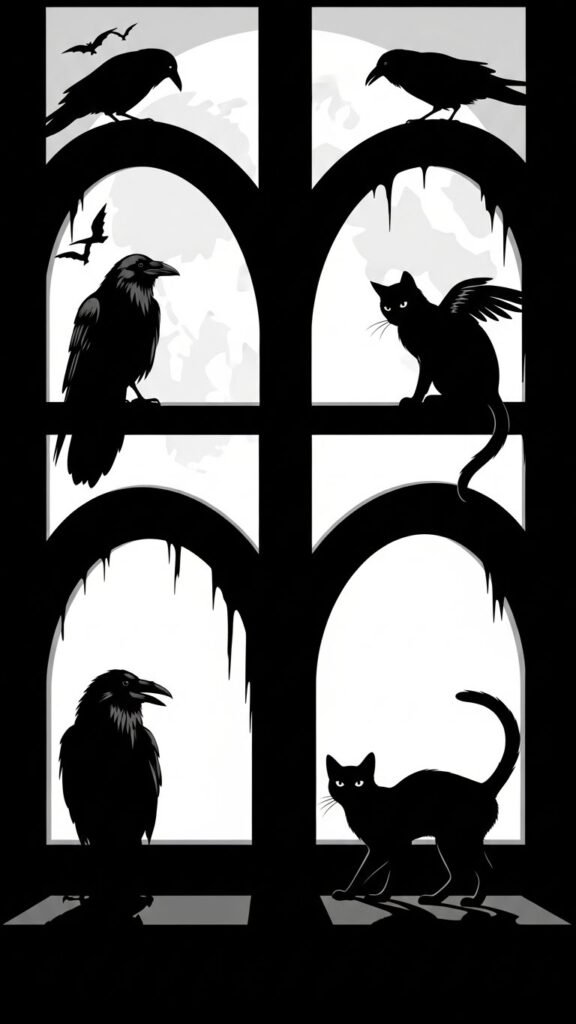
Set a spookily stylish scene by cutting bold black silhouettes of ravens and arched-back cats to perch along your window ledge; position them at varying heights and angles to create motion and tension against a moonlit backdrop. You’ll trace a vintage raven profile and an agile alley cat, then mount with removable putty. Vary sizes, add subtle wing or fur details, and let imagination roam free.
Glowing Lantern and Garland Shapes

Light up your window display by cutting lantern and garland shapes from translucent vellum or thin colored paper so the glow from battery tea lights or string lights filters through warm, jewel-toned hues. You’ll tape LED lanterns behind Garland silhouettes, vary sizes, and layer colors for depth. Hang strands at different heights, secure with removable hooks, and let passersby revel in your liberated, luminous street-side cheer.
Angel Wing and Halo Silhouettes
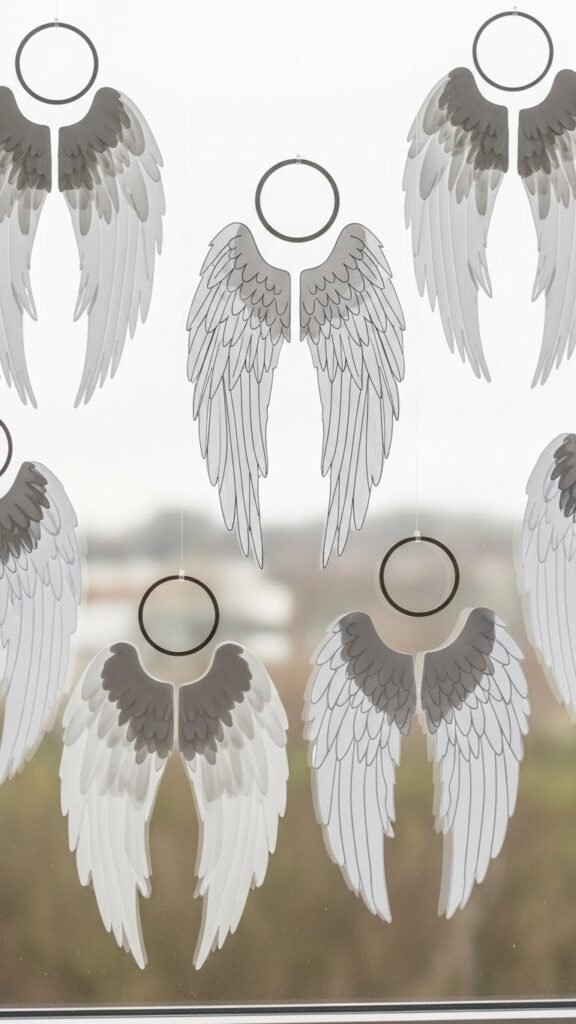
Create graceful angel wing and halo silhouettes by tracing wing shapes onto translucent vellum or thin white cardstock and cutting them out with crisp, clean lines; pair each wing with a simple circular halo cut from metallic paper to catch the light. You’ll mount them to windows so they glow softly lit, show feather texture, and float freely, inviting passerby wonder with minimalist, spirited charm.
Festooned Window Garland With Ornaments
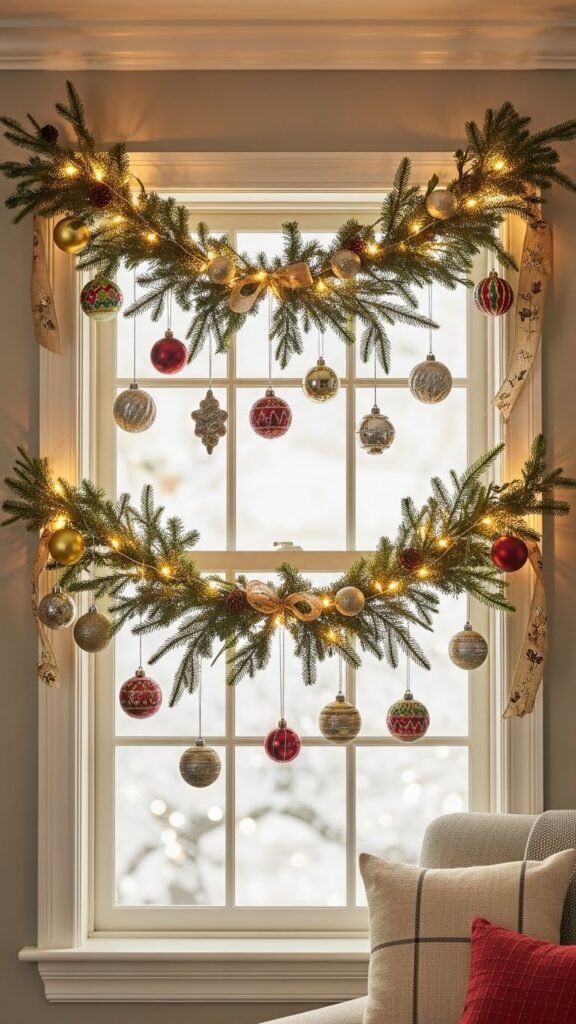
A string of mixed-size ornaments and greenery will turn your window into a merry focal point—start by choosing a sturdy ribbon or twine as the backbone.
You’ll weave a loose festive garland, securing greenery sprigs and hanging ornaments at varied intervals. Hang it high or drape low, adjusting loops for balance. Light it with mini LEDs for a liberated, joyful street-ready display.
Nativity Scene Silhouette Panel
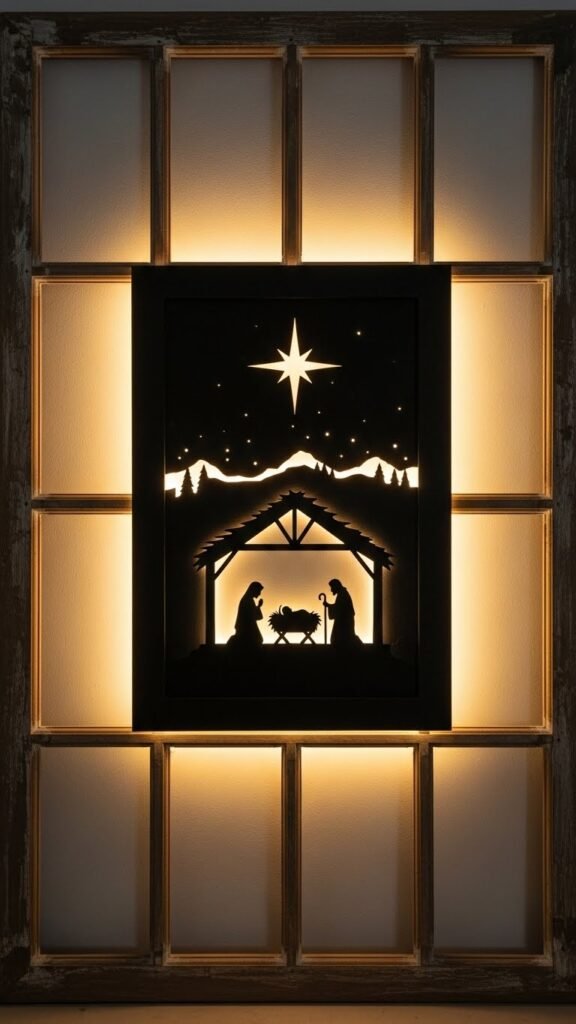
If you want a timeless, rustic focal point for your window, cut a dark panel—black foam board or painted plywood—into a simple skyline and paint or glue on crisp silhouettes of the manger, star, and figures; hang it inside the window so backlighting or a string of warm LEDs casts the scene in sharp relief.
You’ll add a paper nativity touch, arranging pieces for elegant shadow storytelling that feels liberating and sacred.
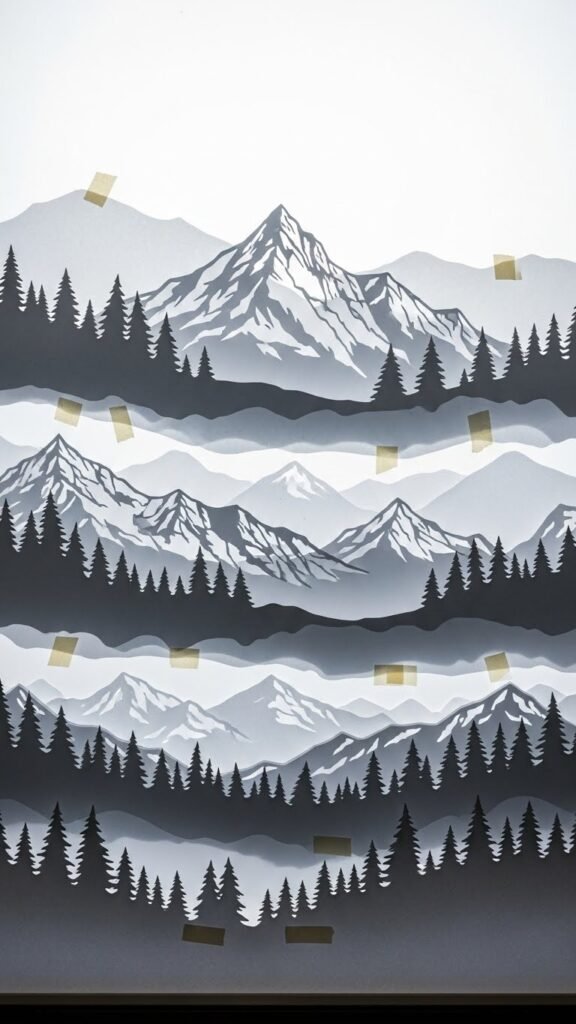
Layered Mountain and Forest Winter Scene
When you layer cutouts of snowy peaks, fir trees, and distant ridgelines at varying depths in the window, the scene will feel like a crisp, luminous winter panorama. You’ll cut and arrange multiple planes for silhouette layering, staggering heights and spacing. Backlit textures pop on vellum and paper; secure layers with removable tape. Step back, tweak distances, and let the vista breathe free.